As you build robust Excel workbooks, you may frequently find the need to re-order or move your rows of data. Being able to swiftly move rows up, down, or to other worksheets is an important skill for organizing your tables and lists within spreadsheets.
Specifically, you will likely need to move rows above their default position to group certain records together for reporting and analysis purposes. By mastering some simple Excel techniques for bumping rows upwards, you can save significant time versus manually typing or copy-pasting.
In this post, we will specifically cover the easiest method for moving Excel rows up to re-order your worksheet data. By relying on the user-friendly click-and-drag approach combined with some best practice tips, shuffling rows becomes second nature. Let’s dive into the step-by-step tutorial.
Why Move Rows in Excel?
Before jumping into the how-to, let’s briefly cover some of the main reasons you may need to move rows in Excel:
- Grouping similar rows – Move rows with similar categories like regions, products, etc. next to each other for structured analysis.
- Hiding detail – Move repetitive detail rows to the bottom and subtotal key data at the top for concise reporting.
- Prioritizing – Bump critical data like totals and summaries to the top for prominence.
- Filtering – Relocate rows outside of filtered table ranges to focus on relevant data temporarily.
- Calculations – Adjust row position to meet formula requirements for arrays or data validation checklist inputs.
As you can see, moving rows serves many purposes beyond just making your spreadsheet look neat! Keep these strategic use cases in mind.
Step-by-Step Guide to Move Rows Up
The easiest way to move a row up in Excel is by using your mouse and the user interface. Here are the steps:
- Suppose we have the following dataset where we have to move rows up
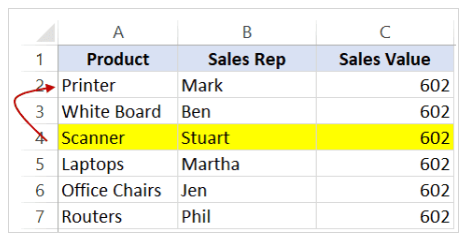
- First, select the entire row you want to move by clicking the row number on the left side. The whole row will become highlighted.
- Next, place your mouse over the border of that selected row. Your mouse cursor will change to a white cross with four arrows.
- Click and drag the row border up to move the row to the desired location. The other rows will automatically shift down.
- Finally, release the mouse button to drop the line into place in the new order.
And there you have it – with some dedicated practice using the click-and-drag row moving method, re-ordering rows in Excel becomes intuitive. The main benefit of using click-and-drag to move Excel rows is it allows you to see exactly where that row will end up as you reposition it.
This gives you precision and accuracy in placing the row which can be important when re-ordering sensitive data. Keep the above usage tips in mind, and you’ll have a customizable worksheet order at your fingertips.
Moving Relative vs Absolute References
One important factor when moving rows in Excel is whether cells contain relative or absolute references.
- Relative references will change when moved to reflect the new cell location. This is the default behavior and is typically fine.
- Use $ signs before the column and row coordinates in a cell to create an absolute reference that does not change when moved.
Understand if your cells reference other data that should not change on the move. Adjust cell references to absolute as needed beforehand.
Tips for Moving Rows in Excel
Here are some additional tips when re-ordering rows in Excel:
- Move rows using click-and-drag for precise placement rather than just keyboard shortcuts.
- Before moving, confirm if any formulas reference the cells and adjust to absolute references if needed.
- An easy way to re-sort rows is to use Excel’s Sort feature on the Data tab rather than manually moving.
- When pasting rows to another location, select cell A1 first so it aligns properly.
- Know the difference between moving visible cells only versus entire rows including hidden cells.
With these handy tutorials under your belt, you’ll be able to swiftly move rows up, down, or all around Excel worksheets to organize your data exactly how you need it.
When to Avoid Moving Rows
While moving rows has many upsides, there are a few cases when you may want to avoid it:
- In shared workbooks, others may be impacted by changes. Use copy/paste as an alternative.
- In tables feeding into PivotTable reports, the field cache order gets impacted.
- With very large data sets inserting rows causes significant file size growth.
- On protected worksheets the ability to move rows is disabled.
As you bump rows around your worksheet, remain conscious of how it may impact other users and workbook elements depending on your specific environment.
Conclusion
Having the ability to properly shuffle and re-order rows in Excel is critical for effective data analysis using spreadsheets. Specifically, moving rows above their default position allows you to intelligently group associated records together to answer business questions accurately and efficiently with your workbook design.
Now that you have mastered the essential click-and-drag skillset combined with usage best practices, moving rows up in Excel should feel straightforward. As you build out complex data tables and lists, don’t hesitate to frequently re-order groups of rows as needed to better organize your analysis structure.
With an adaptable worksheet order utilizing row repositioning methods, you can transform raw datasets into dynamic tools that help drive targeted business insights with Excel.