Creating a monthly schedule in Excel is an essential skill that can greatly enhance your productivity and time management. While you can easily find templates for monthly schedules on the internet, using Excel templates provides a more user-friendly and customizable experience. In this comprehensive guide, we will walk you through the process of creating a personalized monthly schedule in Excel, ensuring you make the most of this powerful tool.
Benefits of Using Excel for Monthly Scheduling
Before we dive into the steps, let’s highlight why using Excel for monthly scheduling is advantageous:
- Ease of Use: Excel’s user-friendly interface makes it accessible to beginners and experts alike.
- Customization: Excel allows you to tailor your schedule to your specific needs, providing flexibility in design and formatting.
- Efficiency: Organizing your tasks and events in Excel can significantly boost your efficiency and help you stay on top of your commitments.
- Data Analysis: Excel’s built-in features for data analysis enable you to gain valuable insights from your monthly schedule, helping you make informed decisions.
- Integration: Excel seamlessly integrates with other Microsoft Office tools, such as Outlook and Word, making it easy to share and sync your schedule with your email and documents.
Getting Started
Before we proceed, please note that this method works best with Excel versions 2016, and 2019, Excel for Mac, and Excel Online. Here’s how to create your monthly schedule:
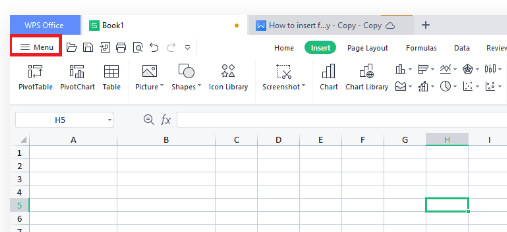
- Open Excel: Launch Excel on your computer.
- Access the Menu: Click on the Menu icon located at the top left corner of the Excel sheet.
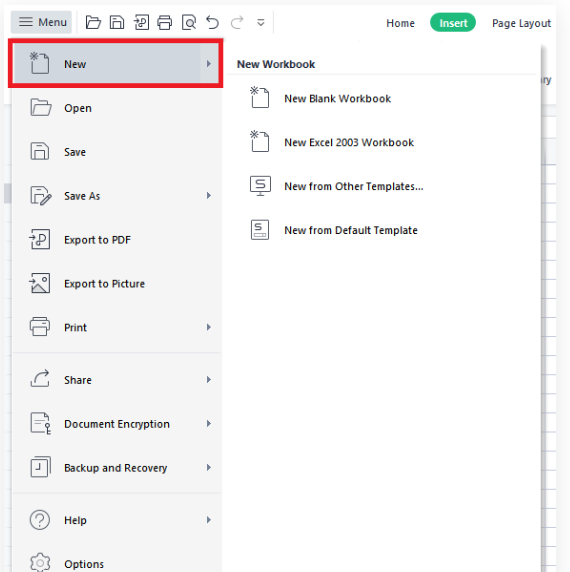
- Create a New Schedule: After clicking on the Menu icon, select “New.”
- Search for Templates: In the search tab that appears, type “monthly schedule” and hit “Enter.”
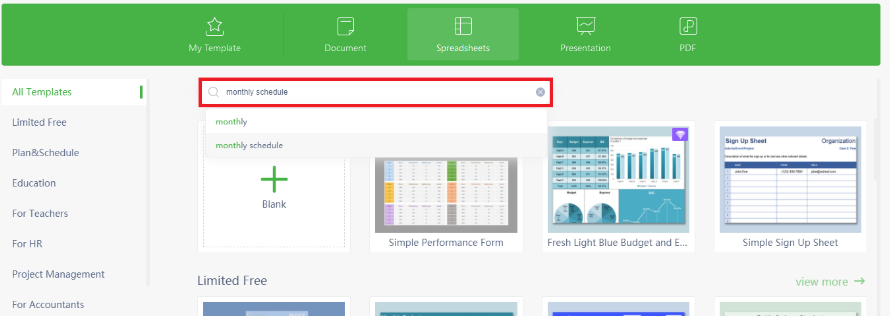
- Choose a Template: Excel will display a selection of pre-made monthly schedule templates. Select one that suits your needs and click on it to begin.

- Customize Your Schedule: Once you’ve selected a template, you can start entering your data and customizing it according to your preferences.

How to Customize a Monthly Schedule in Excel
Customizing your monthly schedule in Excel allows you to tailor it precisely to your requirements, enhancing your organization and time management. Here are the steps to customize your schedule effectively:
- Select the Cell: Choose the cell or range of cells you want to modify. For example, if you wish to change the year on the calendar, select the cell containing the year.

- Input the New Information: After selecting the cell, type in the new information, such as the updated year, and press “Enter.” The new data will replace the previous content in that cell.

- Additional Customization: Excel offers numerous customization options, including changing cell colors, adjusting font sizes, and formatting cells. To change cell colors, select the desired cells, right-click, and choose “Format Cells” to access various formatting options.
- Conditional Formatting: Excel’s conditional formatting feature allows you to apply different formatting styles based on specific conditions. For example, you can highlight due dates in red to draw attention to important deadlines.
- Formulas and Functions: Excel’s extensive library of formulas and functions can automate calculations and data analysis within your monthly schedule. For instance, you can use the SUM function to calculate the total hours worked in a month.
Advanced Tips for Excel Monthly Scheduling
To further enhance your monthly scheduling experience in Excel, consider these advanced tips and techniques:
1. PivotTables for Data Analysis
Utilize PivotTables to analyze your schedule data dynamically. PivotTables enable you to summarize, filter, and visualize your schedule information, providing valuable insights into your activities and priorities.
2. Protecting Your Schedule
To prevent accidental changes to your schedule, you can protect specific cells or sheets within your Excel document. This ensures that your carefully planned schedule remains intact.
3. Excel Add-Ins
Explore Excel add-ins designed for scheduling and time management. These add-ins can extend Excel’s functionality, offering features like task automation, calendar integration, and collaborative scheduling.
4. Mobile Accessibility
Excel is not limited to desktop use. You can access and edit your monthly schedule on the go by using the Excel mobile app, available for both iOS and Android devices. This feature ensures you stay organized no matter where you are.
Conclusion
In conclusion, mastering the art of creating and customizing monthly schedules in Excel can significantly boost your productivity and help you stay organized. Whether you’re managing work tasks, planning personal events, or tracking project timelines, Excel templates provide the flexibility and control you need to create schedules tailored to your unique requirements.
Remember that Excel is a powerful tool not only for scheduling but also for data analysis, visualization, and collaboration. By incorporating advanced features like PivotTables, cell protection, Excel add-ins, and mobile accessibility, you can take your monthly scheduling to the next level and make the most of this versatile software.
So, start creating your customized monthly schedule in Excel today and experience the benefits of efficient time management and data-driven decision-making. With Excel’s robust capabilities at your fingertips, you’ll be well-equipped to excel in both your personal and professional life.