Creating a budget is a fundamental step toward financial stability, and doing it in Excel can make the process even more effective. In this comprehensive guide, we will walk you through the step-by-step process of making a budget in Excel. By the end of this article, you will be well-equipped to take control of your finances and make informed financial decisions.
Why Excel for Budgeting?
Before we dive into the nitty-gritty of creating a budget in Excel, let’s briefly discuss why Excel is an excellent tool for this purpose. Excel offers several advantages that make it the preferred choice for budgeting:
- Flexibility: Excel provides a versatile platform where you can customize your budget to fit your unique financial situation. You’re not limited to a one-size-fits-all template.
- Automation: Excel allows you to automate calculations, making it easier to track your income, expenses, and savings over time. You can create formulas that update your budget automatically.
- Visualization: With Excel’s charts and graphs, you can visualize your financial data, gaining insights that might be difficult to grasp with traditional pen-and-paper methods.
- Accessibility: Excel files can be accessed from various devices, ensuring you have your budget at your fingertips wherever you go.
Now, let’s get into the details of creating your budget in Excel.
Step 1: Organizing Income and Expenses
To kickstart your budgeting journey, you’ll want to organize your income and expenses in Excel. Begin by following these steps:
Categorize Income and Expenses
In column A, list all your sources of income and expenses. This initial organization sets the foundation for your budget’s accuracy and effectiveness.
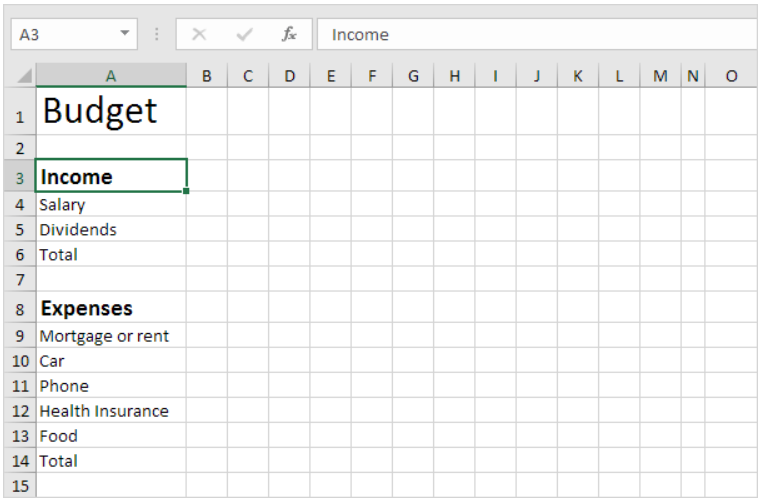
Customize Your Formatting
Utilize Excel’s formatting options on the Home tab within the Font group to make your text visually appealing and easy to read. Adjust font size and style as needed. To improve readability, expand the column width by clicking on the right border of the column A header.
Step 2: Establishing the Time Frame
A crucial aspect of budgeting is defining your time frame. Follow these steps to set up the monthly layout:
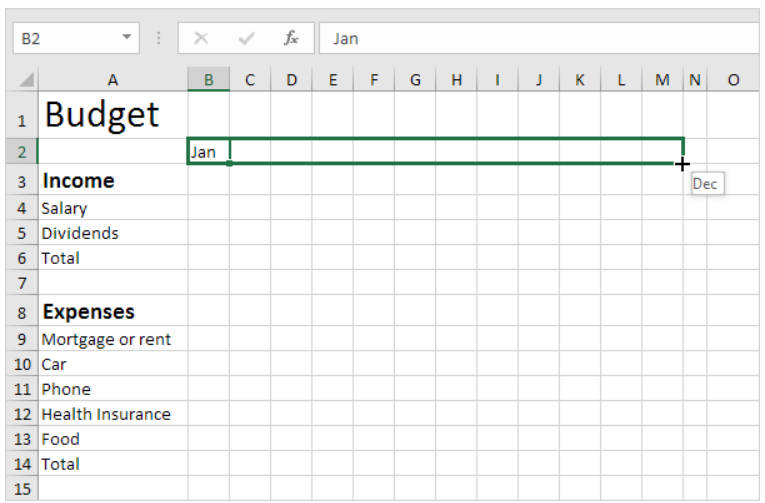
Define the Months
In cell B2, input “Jan” to represent the beginning of the year. Then, select cell B2, click on the lower right corner, and drag your cursor across to cell M2. Excel will automatically populate the other months for you.
Step 3: Inputting Data
Now, let’s add data to your budget. This information will help you monitor your finances effectively.
Entering Financial Data
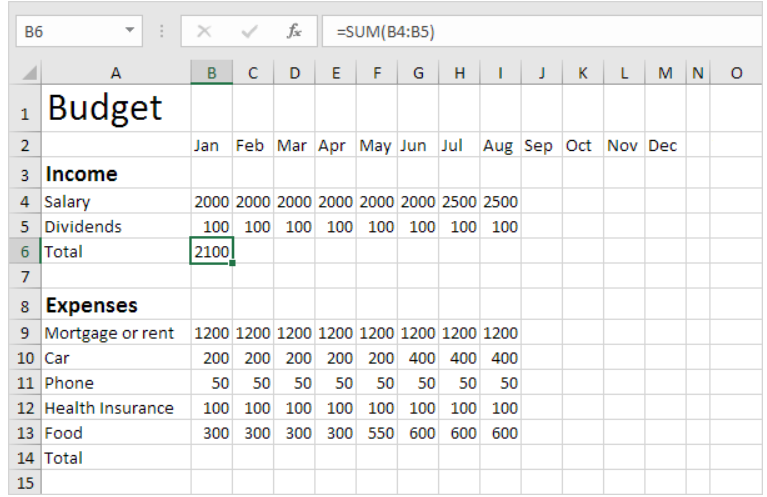
Start by entering your financial data into the corresponding cells in column B. Input your income and expense figures accurately to create a realistic budget.
Step 4: Calculating Totals
Calculating totals is a pivotal part of budgeting, and Excel makes it a breeze.
Applying the SUM Function
In cell B6, input the SUM function to calculate the total income. To do this, select cell B6, type an equal sign (=), enter SUM(, select the range B4:B5, close with a “)” and press Enter.
Step 5: Copying Formulas
Efficiency is key when creating budgets. Let’s copy formulas to streamline the process.
Copying the SUM Formula
Select cell B6, click on the lower right corner, and drag it across to cell M6. Excel will replicate the formula and border formatting to the adjacent cells, ensuring accurate totals for each month.

Step 6: Handling Yearly Totals
To gain a comprehensive overview of your finances, it’s essential to calculate yearly totals.
Calculating Yearly Total
In cell O4, enter the SUM function to calculate the yearly total income. To achieve this, select cell O4, type =SUM(, select the range B4:M4, close with a “)” and press Enter.
Extending Yearly Total
Drag cell O4 down to cell O6 to calculate the yearly totals for expenses.

Step 7: Review and Refinement
Repeat steps 4 to 7 for your expense categories, ensuring all income and expense totals are accurately calculated.
Step 8: Adding a Short/Extra Row
To provide flexibility in your budget, consider adding a short/extra row for miscellaneous or unexpected expenses.

Step 9: Utilizing Conditional Formatting
Enhance the visual appeal and functionality of your budget by implementing conditional formatting rules. These rules can highlight cells with values lower than 0 or greater than 0, making it easier to identify areas that need attention.
Mastering Conditional Formatting
Conditional formatting is a powerful Excel feature. While it may be an advanced topic, exploring it can unlock even more capabilities within your budgeting process.
By following these steps, you’ve successfully created a comprehensive budget in Excel. Remember that effective budgeting is an ongoing process, so regularly update and refine your budget to ensure your financial success.
Conclusion
In conclusion, creating a budget in Excel is a powerful tool for taking control of your finances. By following these steps, you can tailor your budget to your unique financial situation, set clear goals, and make informed financial decisions. Remember that consistency is key; stick to your budget, monitor your progress, and watch your financial stability grow.