In the realm of data organization and spreadsheet management, Microsoft Excel stands as an indispensable tool that empowers users to tackle complex tasks with finesse. From financial analyses to project tracking, Excel’s versatility has revolutionized the way we handle data. However, as our Excel workbooks expand over time, they can accumulate unnecessary sheets that clutter the workspace and hinder efficiency.
If you’ve ever found yourself wrestling with a surplus of sheets, it’s time to discover the art of deleting multiple sheets in Excel. In this blog post, we’ll guide you through a step-by-step process, whether you’re a seasoned Excel user looking to enhance your skills or a beginner seeking effective ways to keep your digital workspace organized. Let’s dive into the world of Excel functions and streamline your workflow by mastering the technique of deleting multiple sheets.
Why Delete Multiple Sheets?
There are several reasons you might need to delete multiple sheets in Excel:
- Data Cleanup: Removing unnecessary sheets helps reduce clutter and makes it easier to find relevant information.
- File Size: Large workbooks with numerous sheets can become unwieldy. Deleting unused sheets can help manage file size.
- Confidentiality: When sharing workbooks, you might want to delete sensitive or confidential sheets before distribution.
Step 1: Selecting Sheets for Deletion
To initiate the process of removing multiple sheets in Excel, you’ll need to begin by selecting the desired sheets. Implement the following actions:
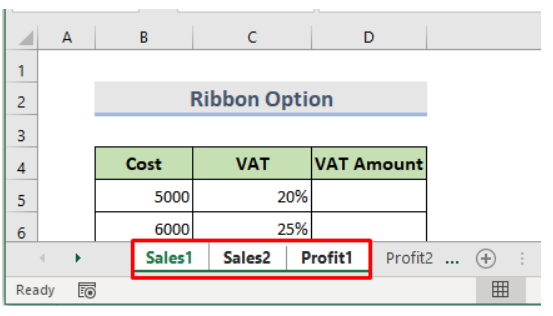
- Press and Hold the Shift Key: Navigate to your workbook and identify the sheets you wish to delete. Press and hold the “Shift” key on your keyboard. While holding the key, click on the sheets you intend to remove. This action will highlight your selected sheets, indicating that they are ready for deletion.
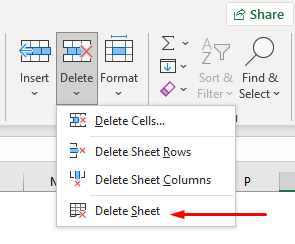
Step 2: Utilizing the Ribbon Option
Once you’ve successfully highlighted the sheets for deletion, the next phase involves utilizing Excel’s Ribbon option. This streamlined method simplifies the process, allowing for hassle-free removal of multiple sheets. Follow these steps:
- Navigate to the Home Tab: Locate the “Home” tab within Excel’s menu bar. This tab hosts various essential commands for managing your workbook.
- Select the Delete Option: Under the “Home” tab, you’ll find a set of commands. Among them, click on the “Delete” option. A drop down menu will appear, revealing further choices.
- Choose Delete Sheet: From the dropdown menu, opt for the “Delete Sheet” command. Excel will instantly recognize your selected sheets and proceed with the deletion process.
Step 3: Confirming Deletion
Before the removal process is finalized, Excel presents a confirmation dialogue box to ensure accurate execution. To proceed with confidence, adhere to the following guidelines:
- Dialogue Box Confirmation: As you select “Delete Sheet,” a dialogue box will promptly emerge on your screen. This box serves as a safeguard, preventing accidental deletions.
- Click OK: Within the dialogue box, locate the “OK” button. By clicking this button, you confirm your intention to delete the selected sheets. Excel will then proceed to execute your command.

Step 4: Witnessing Successful Deletion
With the confirmation step completed, your chosen sheets will undergo deletion, resulting in a streamlined workbook organization.
Tips for Efficient Sheet Management
- Color Coding: Assign different colors to sheets to visually categorize them. This can help prevent the accidental deletion of important sheets.
- Renaming Sheets: Give meaningful names to sheets to make it easier to identify their content.
- Grouping Sheets: Group related sheets together to perform actions on multiple sheets simultaneously.
Precautions Before Deleting Sheets
- Back-Up Data: Before deleting sheets, ensure you have a backup of any critical data. Once deleted, the data is irrecoverable.
- Hidden Sheets: Check if any sheets are hidden. Unhide them if needed before proceeding with deletion.
- Formulas and References: Be cautious if sheets contain formulas or are referenced in other sheets to avoid disrupting calculations.
Conclusion
In conclusion, knowing how to delete multiple sheets in Excel is a useful skill that can improve your efficiency and organization. This guide has provided insights into the process, and as you explore Excel further, you’ll discover even more ways to optimize your workflow. Removing unnecessary sheets will help you navigate your workbooks smoothly and reduce clutter.
With practice and experimentation, you’ll become more proficient in Excel, gaining a valuable tool for managing data and projects effectively. So, take what you’ve learned here and keep exploring Excel’s capabilities to become a more accomplished user, making your spreadsheet tasks simpler and more streamlined.