When it comes to crafting an Excel form, preparation is key. Think of it as the first step in creating a delectable dish – you need the right ingredients and a clear plan. In this guide, we’ll show you how to create an Excel form from scratch, ensuring it’s not only functional but also tailored to your specific needs.
Step 1: Prepare Your Excel Table
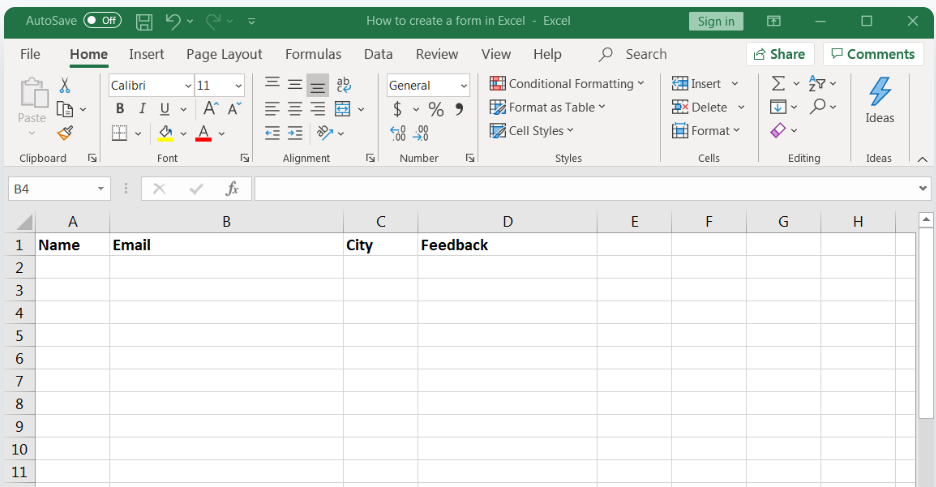
Before diving into the world of Excel forms, make sure you have your columns or fields set up. These columns are the raw ingredients for your form, akin to chili peppers and ginger for a spicy sauce. Let’s assume you’re the proud owner of a hot sauce company, and you want to design a customer feedback form for your delectable sauces. Here are some sample columns you can add to your Excel worksheet:
- Customer Name
- Email Address
- City Name
- Feedback
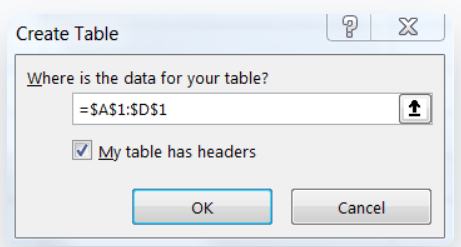
Now, it’s time to convert these column names into an Excel table. Simply select the column headers, click on “Insert,” and choose “Table.”
A dialog box will appear; make sure to check the “My table has headers” box. Click “OK,” and voila!
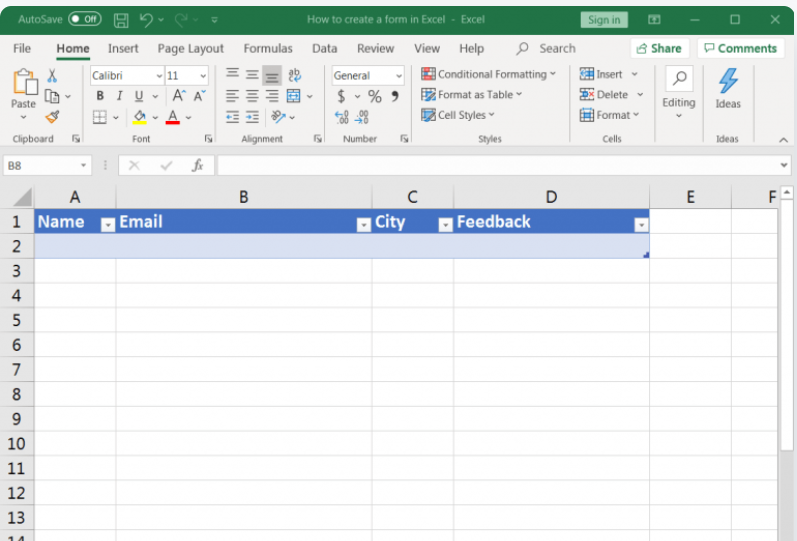
You now have an Excel table ready for your data.
Step 2: Add the Data Entry Form Option
Unfortunately, you won’t find the option to use a data entry form in the standard Excel ribbon. However, you can easily add it. Here’s how:
- Right-click on any existing icon in the ribbon or toolbar.
- Select “Customize the Ribbon.”
- An Excel Options dialog box will appear. Choose “All Commands” from the drop-down list.
- Scroll down and select “Form.”
- Click “Add.”

If this method doesn’t work for you, don’t worry. You can create a custom tab named ‘Form’ by clicking on “New Tab,” renaming it, and adding the “Form” option to a new group. Your Form icon will now be easily accessible.

To make it even more convenient, add the Form button to the Quick Access Toolbar within the Excel Options dialog box. This way, you can access it with a single click.
Step 3: Input Form Data
Now that you’ve set up your Excel table and added the Form option, you’re ready to start entering data. Simply click on any cell within the table and then click the Form icon. A dialog box will open, displaying the field names and buttons for actions like “New,” “Delete,” “Restore,” and criteria settings.

This customized data entry form is based on your table’s fields. Enter the desired data in the fields and click “New” to add it to your Excel table. Click “Close” when you’re done to view your data.
Repeat this process until you’ve entered all the data you need.

Step 4: Apply Data Validation
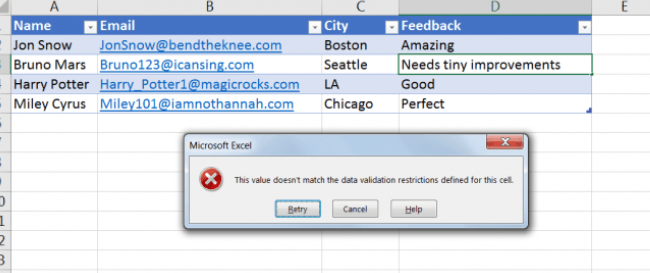
Data validation is crucial for ensuring that the information entered aligns with your criteria or rules. For example, you might want to restrict feedback to short texts. Here’s how to set up data validation:
- Select the cell or cells where you want to add a data validation rule (e.g., cells under the feedback column, D2-D5).
- Click the “Data” tab and choose “Data Validation” from the drop-down list.

- In the Data Validation dialog box, select “Text length” from the “Allow” drop-down.
- Choose the desired text length condition and specify the character limit.
- Click “OK” to apply the rules.

Now, if someone tries to enter feedback exceeding the specified character limit, they will receive an error message, ensuring data consistency.
Step 5: Start Collecting Data
With your Excel form set up, you can begin collecting data. Here are a few options:
- Share the Excel file with customers and ask them to fill out the form. You can invite them via email or share the spreadsheet link.
- Send a copy of the form as an email attachment for recipients to complete.
- Manually enter data as customers provide feedback.
You can access these options by clicking on the “Share” button in the top-right corner of your sheet.
Note: This process differs from creating a custom form using Excel VBA (Visual Basic for Applications), which is a programming language used for automating tasks and creating user forms. This guide focuses on creating a basic Excel data entry form without VBA.
By following these steps, you’ll have a fully functional Excel form that streamlines data collection for your hot sauce business. Happy form-making!