Welcome to our comprehensive guide on how to clear a cell in Excel. As experts in the field of Microsoft Excel and with a passion for providing valuable insights, we have crafted this article to help you clear cells efficiently and effectively. Whether you are a beginner or an experienced user, our step-by-step guide will ensure you master this essential Excel skill.
Understanding the Importance of Clearing Cells
Before we delve into the practical steps, let’s discuss the significance of clearing cells in Excel. Cells in a spreadsheet often contain data, formulas, or formatting. Clearing a cell is essential when you want to:
- Remove Data: Clearing a cell allows you to erase existing data, whether it’s numbers, text, or dates, without affecting other cells in the worksheet.
- Reset Formulas: If you have applied formulas to a cell, clearing it can reset the cell to its default state, removing the formula and the resulting value.
- Undo Formatting: Clearing cells is an effective way to remove formatting such as bold, italics, colors, etc., without manually adjusting each element.
Step-by-Step Guide to Clear a Cell in Excel
Now, let’s dive into the step-by-step process of clearing cells in Microsoft Excel.
Step 1: Opening Microsoft Excel
To begin, open Microsoft Excel on your computer. If you don’t have it installed, you can easily download it from the official Microsoft Office website.
Step 2: Accessing Your Workbook
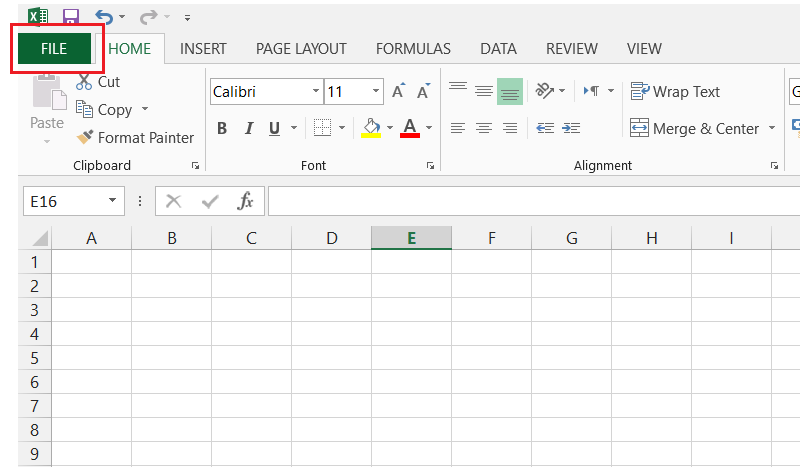
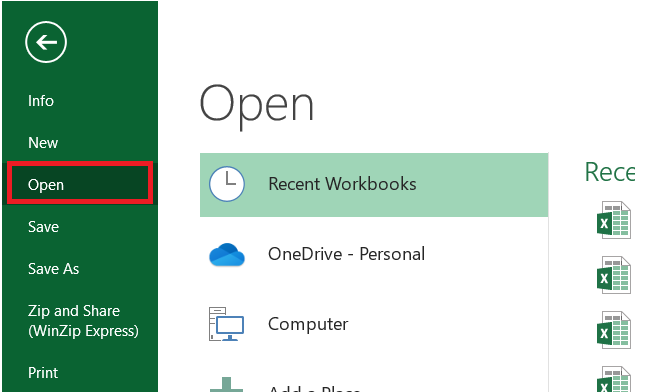
Upon launching Excel, you’ll see a blank workbook. If you already have an existing workbook with the cells you wish to clear, click on “File”

and then “Open” to access it.

Step 3: Selecting the Cell
Once your workbook is open, navigate to the sheet containing the cell you want to clear. Click on the cell to select it. You will notice that the selected cell is outlined with a bold green border.

Step 4: Clearing the Cell Contents
With the cell selected, it’s time to clear its contents. There are several ways to do this:
- Press the Delete Key: Simply press the “Delete” key on your keyboard, and the cell’s contents will be cleared.

- Using the Clear Button: Look for the “Clear” button in the “Editing” group on the “Home” tab. Click on the drop-down arrow next to it and choose “Clear Contents.”

- Right-Click Menu: Another option is to right-click on the cell, and from the context menu, select “Clear Contents.”

Step 5: Confirming the Clear Action
Once you have initiated the clearing action, Excel might prompt you to confirm your decision. If you are certain that you want to proceed, click “OK” to clear the cell.
Step 6: Saving Your Workbook
After clearing the cell, it’s always a good practice to save your workbook to preserve the changes. Press “Ctrl + S” or click on the floppy disk icon in the top-left corner to save.
Additional Tips and Tricks
To further enhance your Excel skills and optimize your experience, we have compiled some additional tips and tricks:
Tip 1: Clearing Multiple Cells: If you need to clear multiple cells at once, you can do so by selecting a range of cells before following the clearing steps mentioned earlier.
Tip 2: Clearing Formatting Only: If you wish to retain the data but remove formatting, use the “Clear Formats” option instead of “Clear Contents” from the right-click menu or the “Clear” button dropdown.
Tip 3: Clearing All Content and Formatting: In some instances, you might want to remove all content and formatting from a worksheet. To do this, select the entire sheet by clicking on the triangle at the top-left corner (above row 1 and to the left of column A), and then clear the contents as explained in Step 4.
Tip 4: Utilize Excel’s Undo Feature: Remember that Excel has an “Undo” feature that allows you to reverse your last action quickly. If you accidentally clear a cell, press “Ctrl + Z” to undo the deletion.
Mastering Excel Cell Clearing: Your Key to Data Management
Clearing cells in Microsoft Excel is a fundamental skill that every user should master. Whether you are working with large datasets, creating reports, or simply managing your personal finances, knowing how to clear cells efficiently will save you time and improve the accuracy of your work.
So, practice the steps outlined in this guide, explore the additional tips provided, and soon you’ll become a proficient Excel user. As you continue your Excel journey, remember that mastering one function often leads to unlocking new possibilities and boosting your overall productivity.
