As Excel spreadsheets grow in complexity with more data, formulas, and sensitive information, it becomes increasingly important to lock down certain aspects from editing. By locking cells, formulas, or the entire spreadsheet, you can control access and prevent unintended changes that may corrupt or compromise your data.
While Excel provides multiple types of protection locks, it may not be immediately clear to new users how to implement these crucial security features. In this comprehensive guide, we will explore the different locking options available in Excel and how you can use them effectively to safeguard your spreadsheets.
Follow along as we break down step-by-step how to lock entire worksheets using Excel’s Built-in protection capabilities. With the ability to apply customized locks, you’ll be able to confidently share your spreadsheets without worrying about unauthorized or accidental changes. So read on to become an Excel locking expert!
Why Locking an Excel Spreadsheet is Important
Before we dive into the steps, let’s briefly discuss why locking an Excel spreadsheet is essential.
Data Privacy
Excel is a versatile tool used for various purposes, including financial calculations, data analysis, and project management. Often, these spreadsheets contain confidential information like budgets, financial statements, or customer data. By locking your Excel spreadsheet, you ensure that only authorized users can access and view this sensitive data.
Prevent Unauthorized Changes
Locking your Excel worksheet not only restricts access but also prevents unauthorized modifications. This is crucial when you want to maintain data integrity and avoid accidental or deliberate alterations that could lead to errors.
Maintain Worksheet Structure
Locking a worksheet also helps you maintain the structure of your document. Without proper protection, users may unintentionally delete, move, or rename worksheets, causing confusion and potential data loss.
Now that we understand the importance of locking an Excel spreadsheet, let’s dive into the step-by-step process.
Step 1: Hiding Your Worksheet
To begin, you need to hide the worksheet you want to protect. Here’s how to do it:
- Right-click on the sheet you want to hide (e.g., Sheet 1).
- Select “Hide” from the context menu.
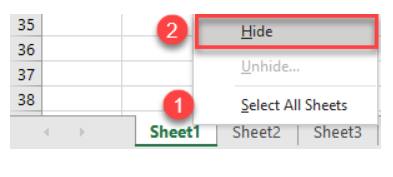
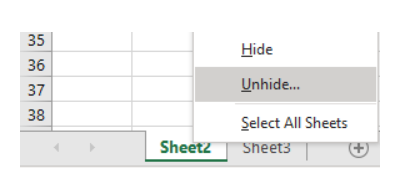
Hiding the sheet will make it invisible, but keep in mind that users can still unhide it if the workbook isn’t protected.
Step 2: Protecting the Workbook
Now, let’s move on to the crucial step of protecting the entire workbook. This will ensure that even if someone tries to unhide the sheet, they won’t be able to access it without the correct password.
- In the Excel Ribbon, navigate to the “Review” tab.
- Click on “Protect Workbook.”

- A dialog box will appear. Enter a strong password and click “OK.”

- You’ll be prompted to reenter the password for confirmation. After doing so, click “OK.”

Congratulations! You’ve successfully protected your Excel workbook, making it extremely secure.

Advanced Techniques to Enhance Security
While the above steps are sufficient for basic security, there are more advanced techniques you can employ to enhance the protection of your Excel spreadsheet.
1. Password Complexity
Ensure that your password is strong and includes a combination of uppercase and lowercase letters, numbers, and special characters. This makes it significantly harder for unauthorized users to guess.
2. Regularly Update Passwords
To maintain security, it’s a good practice to change your passwords periodically. This adds an extra layer of protection, especially if you’re sharing the spreadsheet with others.
3. Document Encryption
Consider encrypting your entire Excel document using advanced encryption algorithms. This adds an additional layer of security, making it virtually impossible for unauthorized users to access your data.
4. Restrict Editing
In addition to protecting the worksheet, you can also restrict editing privileges. This allows you to specify who can make changes to the spreadsheet and who can only view it.
5. Trusted Locations
By specifying trusted locations in Excel, you can ensure that your spreadsheet is safe from potentially harmful macros or add-ins. This is especially important for maintaining the security of your data.
Conclusion
In conclusion, knowing how to lock an Excel spreadsheet is crucial for safeguarding your sensitive data and ensuring data integrity. By following the steps outlined in this comprehensive guide and implementing advanced security measures, you can have peace of mind knowing that your Excel documents are well-protected. Remember, in today’s digital world, data security should always be a top priority.