Managing data in Excel can be a challenging task, especially when dealing with large datasets that might contain duplicate entries. Deleting duplicates while retaining one unique record is a common requirement in data processing.
In this article, we’ll explore various methods to accomplish this task efficiently. Whether you’re a seasoned Excel user or a novice, you’ll find these techniques helpful in keeping your spreadsheets clean and organized.
1. Using Excel’s Built-In Features
Excel offers a few built-in features that make it easy to remove duplicates while preserving one instance of each entry.
- Open your Excel spreadsheet.
- Select the range of cells where you want to remove duplicates.
- Navigate to the “Data” tab in the Excel ribbon.
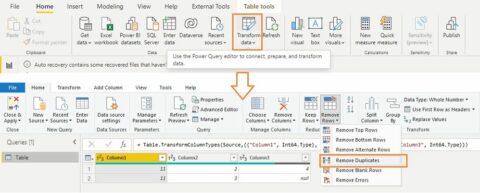
- Click on the “Remove Duplicates” button.
- In the “Remove Duplicates” dialog box, choose the columns you want to check for duplicates.
- Ensure the “Unique records only” option is checked.
- Click “OK” to remove duplicates while keeping one instance of each record.

2. Advanced Filter
The Advanced Filter feature in Excel can be a powerful tool for removing duplicates while maintaining a single copy of each unique record.
- Select the range containing your data.
- Go to the “Data” tab in the Excel ribbon.
- Click on “Advanced” in the “Sort & Filter” group.
- In the “Advanced Filter” dialog box, select the “Copy to another location” option.
- Choose a destination cell where you want to copy the unique records.
- Ensure the “Unique records only” checkbox is selected.
- Click “OK” to filter out duplicates and keep a single instance of each unique record in the specified destination.
3. Formula-Based Approach
If you prefer a formula-based solution, you can use Excel’s functions to remove duplicates while keeping one record. Here’s how you can do it:
- In a new column, let’s say, “Column C,” enter the following formula in the first cell (assuming your data starts in cell A2): =IF(COUNTIF($A$2:$A2, $A2)=1, “Keep”, “Remove”).
- Drag the fill handle (a small square at the bottom-right corner of the selected cell) down to apply the formula to the entire column.
- Filter the “Column C” to display only “Keep” records.
- Copy and paste the filtered data to a new location or overwrite your existing data if you want to replace it with the filtered data.
4. VBA Macro
For more advanced users, you can use a VBA (Visual Basic for Applications) macro to automate the process of removing duplicates while preserving one instance of each unique record.
Here’s a sample VBA code to achieve this:

Remember to replace “Sheet 1” with the name of your sheet if it’s different. You can run this macro by pressing “Alt + F11” to open the VBA editor, then paste the code and execute it.
Conclusion
Managing data in Excel is made easier when you know how to delete duplicates in Excel but keep one unique instance. You have several methods at your disposal, ranging from Excel’s built-in features to more advanced approaches like using formulas and VBA macros.
Choose the method that best suits your needs and level of expertise. By following these techniques, you can maintain clean and organized spreadsheets, ensuring that your data remains error-free and easily accessible.