In the fast-paced world of data management and spreadsheet analysis, Excel stands as the undisputed champion. Its versatility, power, and user-friendly interface make it the go-to tool for professionals in various industries.
One of the essential features that often comes in handy when working with data in Excel is the ability to group rows. This seemingly simple task can significantly enhance your data organization and analysis capabilities. In this comprehensive guide, we’ll delve into the art of grouping rows in Excel, providing you with the knowledge and techniques to become a true Excel master.
Understanding the Importance of Row Grouping
Before we dive into the how-tos of grouping rows in Excel, it’s crucial to understand why this feature is so indispensable. Row grouping allows you to categorize and structure your data effectively, making it easier to navigate and analyze. Here are some key reasons why mastering row grouping can be a game-changer for your Excel skills:
1. Enhanced Data Organization
Grouping rows allows you to create a more organized and structured spreadsheet. You can group similar data sets, which makes your document neater and more user-friendly.
2. Simplified Data Analysis
When you’re dealing with a large dataset, it’s often challenging to focus on specific information. Row grouping enables you to collapse and expand sections of your data, letting you concentrate on the relevant parts of your spreadsheet.
3. Improved Presentation
If you need to share your Excel data with others, grouped rows make it easier for your audience to follow and understand your content. This feature enhances the overall presentation of your data.
Now that we’ve established the significance of row grouping in Excel, let’s proceed to the practical steps to help you master this essential skill.
Step-by-Step Guide to Grouping Rows in Excel
Step 1: Open Your Excel Spreadsheet
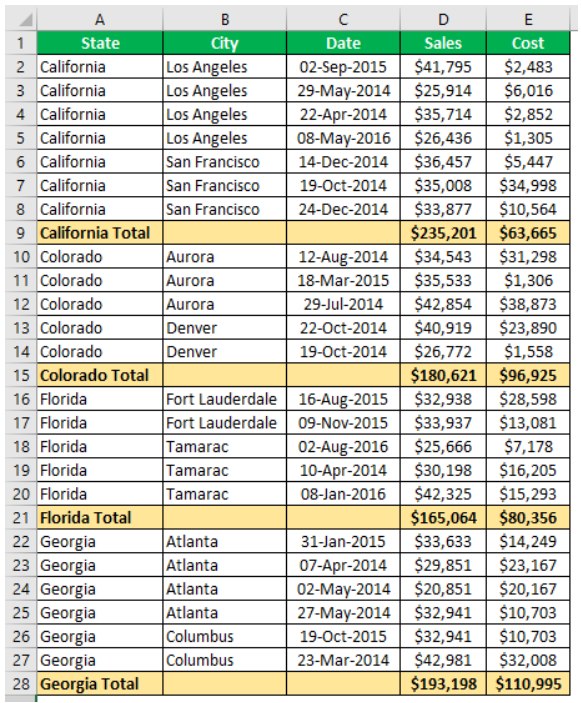
To begin, open the Excel spreadsheet that contains the data you want to work with. If you don’t have one ready, create a new sheet and input your data.
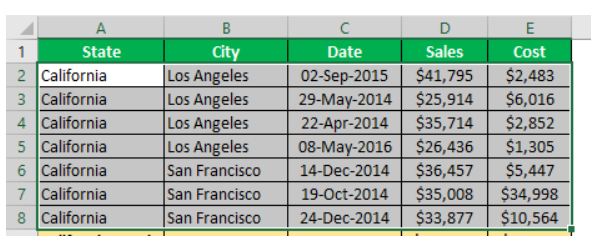
Step 2: Select the Rows to Group
Click and drag your cursor to select the rows you want to group.
Step 3: Group the Selected Rows
With your rows selected, right-click on any of the selected rows and choose “Group” from the context menu.

After that, choose the rows option from the dialogue box:

This action will create a collapsible section that groups the selected rows.

Step 4: Name Your Group
You can give your group a meaningful name to make it easily identifiable. To do this, right-click on the group, choose “Group” from the context menu, and select “Edit Group.”
Step 5: Collapse and Expand Rows
To maximize the benefits of row grouping, you can collapse and expand the grouped rows by clicking the minus and plus icons next to your group’s name.
Step 6: Modify or Delete Groups
If you need to make changes to your groups or remove them, you can right-click on the group, choose “Group” from the context menu, and select “Ungroup” or “Delete.”
Advanced Tips for Row Grouping
To truly become an Excel pro, consider these advanced tips for row grouping:
1. Nested Grouping
You can create hierarchical structures by nesting groups within other groups. This feature is particularly useful for complex data sets.
2. Keyboard Shortcuts
Excel offers keyboard shortcuts for many functions, including row grouping. Learn these shortcuts to increase your efficiency.
3. Formulas and Aggregations
Utilize Excel formulas and aggregations within your grouped sections to perform complex calculations.
4. Data Validation
Implement data validation rules within your grouped rows to maintain data integrity and consistency.
Conclusion
In conclusion, grouping rows is an indispensable yet underutilized skill that separates Excel novices from experts. By taking the time to properly structure your data into organized, collapsible groups, you can transform chaotic spreadsheets into streamlined, easy-to-navigate resources.
Implement the techniques outlined here, such as nesting groups, applying keyboard shortcuts, and utilizing formulas, to take your Excel abilities to the next level. With the ability to wrangle complex data sets and present clear overviews, you will gain confidence in your Excel proficiency. So embrace the immense power of row grouping, and you will find yourself on the path to mastering Excel.