Using Excel on a Mac opens the door to a world of data manipulation, analysis, and organization right at your fingertips. Whether you’re an aspiring data scientist, a financial analyst, or a student managing coursework, Excel for Mac offers a versatile set of tools for making sense of numbers and information.
Here, you will get to know how to use Excel on Mac by using a step-by-step procedure.
Step 1: Installing Excel on Your Mac
If you don’t already have Microsoft Excel installed on your Mac, here’s how you can get it:
- Microsoft 365 Subscription: The easiest way to get Excel on your Mac is to have a Microsoft 365 subscription. This subscription includes access to the latest version of Excel and other Microsoft Office apps. You can download and install it from the Microsoft 365 website.
- Purchase Microsoft Office: You can also purchase a standalone version of Microsoft Office for Mac, which includes Excel. After purchase, follow the installation instructions provided.
- Excel Online: If you prefer not to install Excel on your Mac, you can use the online version of Excel. Go to the Office Online website, sign in with your Microsoft account, and start using Excel in your web browser.

Step 2: Launching Excel
Once you’ve installed Excel, it’s time to open the application. You can do this by following these simple steps:
- Click on the Finder icon in your Mac’s dock.
- In the Finder window, navigate to Applications.
- Scroll down until you find Microsoft Excel, then double-click on it to launch the application.
Step 3: Navigating the Excel Interface
Excel’s interface on Mac is quite similar to the Windows version. It consists of various components:
- Ribbon: The ribbon is the toolbar at the top of the Excel window, containing tabs like File, Home, Insert, and more. It provides access to various commands and features.
- Worksheet Area: The main area of the Excel window is where you create and manipulate your spreadsheets. It’s divided into rows and columns to form cells, where you can input data, formulas, and more.
- Formula Bar: Below the ribbon, you’ll find the formula bar. This is where you can enter and edit formulas, functions, and data for the currently selected cell.
- Columns and Rows: Columns are labeled with letters (A, B, C, etc.), while rows are labeled with numbers (1, 2, 3, etc.). These labels help you reference cells in your spreadsheet.
- Sheets: At the bottom of the window, you’ll see sheet tabs. You can use these tabs to switch between different worksheets in your Excel file.
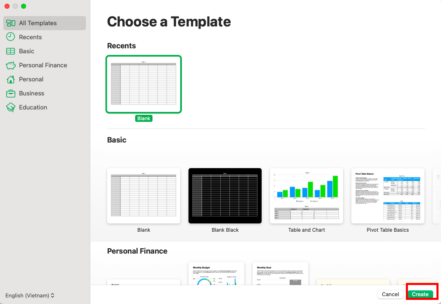
Step 4: Creating a New Workbook
Now that you’re familiar with the Excel interface, let’s create a new workbook to start working with your data:
- Click on File in the ribbon.
- Select New Workbook. This will open a new, blank Excel file.
Step 5: Entering Data
You can now start entering data into your Excel spreadsheet. Here’s how:
- Click on the cell where you want to enter data.
- Begin typing. As you type, the data will appear in the formula bar.
- Press Enter to move to the cell below or press Tab to move to the cell on the right.
- To edit data, double-click on the cell or select it and start typing. Press Enter to save the changes.
Step 6: Formatting Cells
Excel allows you to format cells to make your data more visually appealing and easier to read. To format a cell, follow these steps:
- Select the cell or cells you want to format.
- Go to the Home tab in the ribbon.
- Use the formatting options such as font, borders, fill color, and more to change the appearance of the selected cells.
Step 7: Creating Formulas
One of the most powerful features of Excel is its ability to perform calculations and create formulas. Here’s how to create a simple formula:
- Click on the cell where you want the result of your formula to appear.
- Type an equal sign (=) to start a formula.
- Enter the formula, for example, to add the values in cells A1 and A2, you would type: =A1 + A2.
- Press Enter to execute the formula, and the result will appear in the selected cell.
Excel offers a wide range of built-in functions for more complex calculations. You can access them through the Formulas tab in the ribbon.

Pros of Using Excel on Mac:
- Familiar Interface: Excel on Mac provides an interface similar to its Windows counterpart, making it easy for users to switch between platforms.
- Cross-Platform Compatibility: Excel files created on Mac can be easily shared and edited on Windows, and vice versa. This cross-platform compatibility is valuable in collaborative work environments.
- Feature Parity: The Mac version of Excel offers most of the same features and functions available in the Windows version, ensuring that Mac users can perform advanced data analysis and modeling tasks.
- Integration with Other Mac Apps: Excel on Mac integrates well with other macOS applications, such as Numbers and AppleScript, allowing for enhanced productivity and automation.
- Regular Updates: Microsoft actively updates Excel for Mac, ensuring that users have access to the latest features and security enhancements.
Cons of Using Excel on Mac:
- Potential Performance Differences: While Excel on Mac is powerful, there may be minor performance differences compared to the Windows version. Complex and resource-intensive tasks may take longer to complete.
- Keyboard Shortcuts: Some users may find that certain keyboard shortcuts are different on the Mac version, which can be a bit confusing for users familiar with Windows Excel.
- VBA (Visual Basic for Applications): While Excel for Mac supports VBA, it may not offer the exact same experience as the Windows version. Some VBA functions may behave differently, and add-ins developed for Windows Excel may not work seamlessly.
- Compatibility with Legacy Files: Older Excel files may not always open perfectly in the Mac version, especially if they contain macros, complex functions, or formatting that relies on specific Windows fonts.
- Cost: While Excel Online provides a free option, the full-featured version of Excel on Mac usually requires a Microsoft 365 subscription or a one-time purchase, which may be a financial consideration for some users.
Conclusion
In conclusion, using Excel on a Mac is a practical and powerful choice for users who want to work with spreadsheets, perform data analysis, and create complex models.
The step-by-step guide provided in this article should help you get started with Excel on your Mac, whether you’re a beginner or an experienced user. Keep in mind the pros and cons, and make the most of this versatile tool to streamline your work and enhance your productivity.