Are you tired of juggling multiple Excel files, trying to make sense of scattered data across different spreadsheets? If so, you’re not alone. Many professionals grapple with the challenge of consolidating data from various Excel files efficiently. Whether you’re a data analyst, a financial expert, or just someone looking to streamline your spreadsheet tasks, this blog post is your solution.
In the following paragraphs, we will delve into the art of seamlessly combining Excel files, unlocking the power of data cohesion and simplifying your workflow. Say goodbye to the chaos of scattered data, and say hello to a more organized and productive Excel experience.
Preparing Your Workspace
Before diving into the process of combining Excel files, it’s crucial to set up your workspace for optimal efficiency. Follow these steps:
Step 1: File Extraction
To begin, extract all the necessary files from your designated sample folder. You can save this folder on your desktop or any location of your choice. Organizing your files beforehand ensures a smooth workflow.

Step 2: Launching Excel
Now, open a new Excel workbook. We will be using a powerful tool called “POWER Query” to streamline the merging process. Follow these steps:
- Go to the “Data” tab.
- Select “Get & Transform Data.”
- Click on “Get Data.”
- Choose “From File.”
- Opt for “From Folder.”

Step 3: Locating Your Files
In the dialog box that appears, locate the folder where you’ve saved your Excel files. This step allows Excel to access the data within those files.

Merging Your Data
With your workspace prepared, let’s move on to merging the data from your Excel files.
Step 4: Window of Possibilities
After clicking “OK” in the previous step, you’ll be presented with a window listing all the files within the designated folder.

Step 5: Combining & Editing
To combine data from these files, click on the “Combine & Edit” button.

This action will lead you to a preview of the data contained within the files, displayed conveniently alongside the window.
Step 6: Selecting Your Table
Now, it’s time to select the table that contains the data you wish to combine from all the workbooks. This step is crucial in ensuring a seamless merging process.

Step 7: Confirm and Proceed
Once you’ve selected the appropriate table, click “OK.” At this juncture, you’ve successfully merged data from all the files into your Power Query Editor. Keep an eye out for a new column, which will display the names of the workbooks the data was extracted from.

Step 8: Polishing Your Data
To further refine your merged data, follow these steps:
- Right-click on the column header containing the workbook names.
- Select “Replace Values.”

Step 9: Removing File Extensions
In the “Replace Values” dialog box, input “.xlsx” into the “Value to Replace” field. Leave the “Replace With” field blank. This action will remove the file extensions from the workbook names.

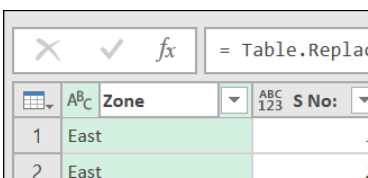
Step 10: Customizing Column Names
For enhanced clarity and organization, double-click on the header of the newly created column and select “Rename.” Here, you can enter a suitable name for the column, such as “Zone.”
Finalizing Your Merged Data
With these meticulous steps completed, your merged data is now polished and ready for use. To complete the process, follow this final step:
Step 11: Loading Your Data
Navigate to the “Home” tab and click on “Close & Load.”
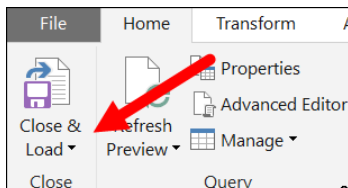
This action will load your combined data, sourced from all the workbooks, into your new workbook.

Additional Tips for Excel Data Management
To further elevate your Excel data management skills, consider these additional tips:
- Data Validation: Before merging data, perform data validation to ensure consistency and accuracy. Identify and resolve any discrepancies or errors in your Excel files.
- Data Cleaning: Cleanse your data by removing duplicates, empty cells, and irrelevant information. This will result in a more streamlined dataset.
- Use PivotTables: After merging your data, employ PivotTables to analyze and visualize your information effectively. PivotTables can help you extract valuable insights from your combined dataset.
- Automation: Explore automation options to simplify repetitive tasks. Excel offers macros and scripts that can streamline data-merging processes, saving you even more time.
- Regular Backups: Always maintain backup copies of your original Excel files. This precaution ensures that your data remains secure in case of any unexpected issues during the merging process.
Conclusion
In conclusion, mastering the art of combining Excel files is an invaluable skill that can significantly enhance your data management capabilities. With the steps outlined in this guide, you can efficiently merge data from multiple sources into a single, coherent workbook, streamlining your workflow and improving productivity. Take control of your data, and harness the power of Excel to work smarter, not harder.