Unlocking the full potential of Microsoft Excel often involves mastering its many features and functionalities. One such essential skill is the ability to insert a signature directly into your Excel documents.
In today’s fast-paced digital world, where remote work and electronic document management are becoming increasingly prevalent, knowing how to add your signature within an Excel file can save you time and enhance the professionalism of your work.
Whether you’re a business professional, a student, or anyone who regularly uses Excel for various purposes, this blog post will serve as your comprehensive guide to seamlessly incorporating signatures into your spreadsheets. Join us as we demystify the process and empower you with the knowledge to excel in Excel signature insertion.
Understanding the Importance of Digital Signatures
Before we delve into the step-by-step process of adding a signature in Excel, let’s first understand why digital signatures are crucial in today’s document-driven landscape. Digital signatures offer several advantages, including:
Security: Digital signatures ensure the authenticity and integrity of your documents. They help verify that the document has not been altered since it was signed.
Efficiency: Gone are the days of printing, signing, scanning, and sending physical documents. With digital signatures, you can complete transactions and approvals swiftly, reducing paper waste and saving time.
Legality: Many countries recognize digital signatures as legally binding, making them a trusted way to sign contracts, agreements, and other important documents.
Step-by-Step Guide to Inserting a Signature in Excel
Now that we’ve established the significance of digital signatures, let’s walk through the process of adding your signature to an Excel document:
Method 1: Drawing Tool Signature
The first way to add a signature in Excel is by utilizing the drawing tool. Follow these steps to create your electronic signature:
- Access the Spreadsheet: Begin by opening the Excel spreadsheet you wish to sign.
- Navigate to ‘Draw’: In the header navigation, locate and select the ‘Draw’ option.
- Choose a Pen: Once in the drawing tool, you’ll find a selection of pens. Click on the black pen to start drawing your signature directly onto the sheet. Don’t worry if you make any errors; you can easily correct them using the eraser tool.
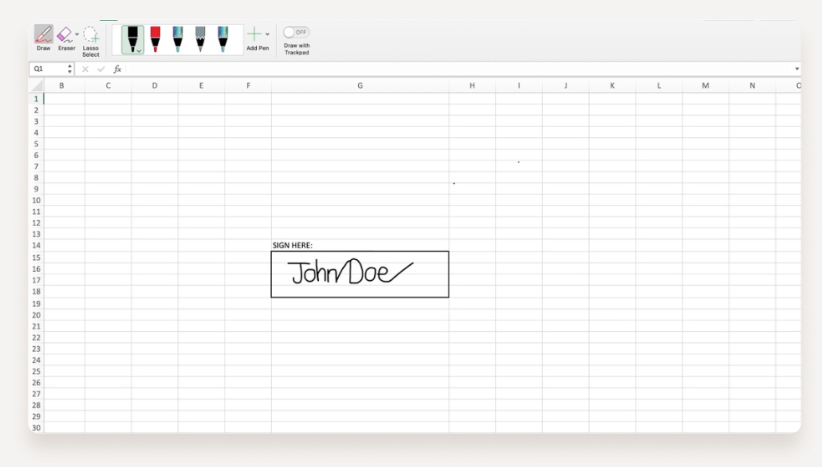
- Adjust Signature Size and Position: If your signature appears too large or in an incorrect location, use the ‘Lasso Select’ tool. Draw around your signature to group it, allowing you to move and resize it until it fits perfectly within the signature box.
This method provides a quick and straightforward way to add your electronic signature to an Excel document.
Method 2: Inserting a Signature Image
Another method for adding a signature in Excel is by inserting an image of your signature into the designated signature box. Here’s how to do it:
- Open Your Spreadsheet: Start by opening the Excel spreadsheet that requires your signature.
- Access ‘Insert’ and ‘Image’: In the header navigation bar, click on ‘Insert,’ and then select the ‘Image’ icon.
- Choose Your Signature Image: A menu of options will appear. You can either select a photo from your photo folder or your downloads folder. In the example below, we’re selecting an image from our downloads folder.
- Select Your Signature: Navigate to your chosen folder (downloads, in this case) and choose the photograph or scanned signature you wish to add to the Excel sheet.

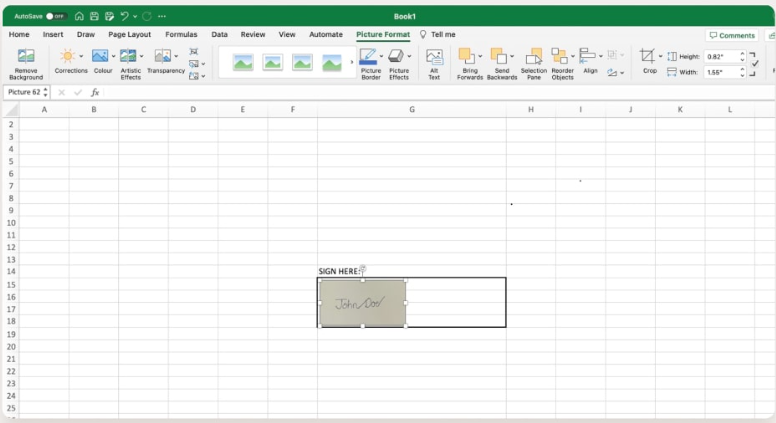
- Adjust the Image: After selecting your image, it will appear in the spreadsheet. However, it may require resizing and repositioning to fit the signature box correctly. Refer to the screenshot below for a visual guide on this process.
Method 3: Using an Add-On for a Digital Signature
For a more sophisticated approach to adding a digital signature in Excel, consider utilizing Microsoft add-ons such as DocuSign or Adobe Sign. This method provides an enhanced level of security and authentication for your Excel documents. Here’s how to go about it:
- Explore Microsoft Add-Ons: Start by exploring the Microsoft marketplace for electronic signature solutions.
- Select and Connect: Choose a suitable eSignature tool and connect it to your Excel sheet. These tools often come with a variety of features for added convenience and security.
- Purchase and Install: Please note that you may need to purchase these add-ons separately to use them effectively.
By adopting one of these add-ons, you can streamline the process of adding electronic signatures to your Excel documents, ensuring the utmost security and credibility.
Conclusion
In conclusion, adding signatures in Excel is an essential skill for anyone handling electronic documents. Whether you prefer the simplicity of the drawing tool, the visual appeal of an inserted image, or the advanced security of an add-on, these methods allow you to create professional electronic signatures in Excel with ease. Elevate the credibility of your documents and enhance their security by incorporating these signature techniques into your Excel workflow.