Dealing with dates in Excel can be both essential and challenging, especially when you want to focus on specific aspects like months and days rather than the entire date. Removing the year from a date is a common task that can simplify data analysis and visualization. In this article, we’ll explore two straightforward methods to achieve this: the Text to Columns feature and custom date formatting.
Whether you’re a novice or an expert, manipulating dates is a crucial skill. In this concise tutorial, we’ll navigate through various techniques, from basic subtraction to specialized functions. By the end, you’ll be adept at seamlessly extracting years from dates, empowering you to enhance your data analysis prowess. Join us on this journey to simplify date manipulation in Excel and gain confidence in your spreadsheet skills. Let’s dive in and master the art of date manipulation together!
The Significance of Removing the Year
Before delving into the methods, it’s worth understanding the importance of removing the year from a date. In scenarios like sales tracking, event planning, or project timelines, you might be more interested in trends and patterns within months and days rather than the entire date. By eliminating the year, you can streamline your analysis and draw insights more effectively.
Method 1: Utilizing the Text-to-Columns Feature
The Text to Columns feature is a versatile tool in Excel that can split data into separate columns based on a delimiter. In our case, we won’t actually use a delimiter, but rather a unique approach to achieve our goal.
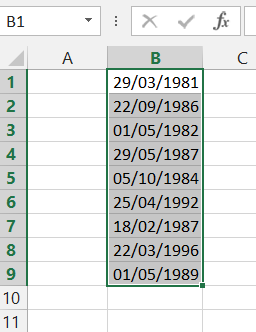
Step 1: Select the Date Column
Start by selecting the column containing the dates you want to modify. This method is particularly useful when you have a range of dates that need adjustment.
Step 2: Access the Text to Columns Wizard
- Navigate to the “Data” tab on the Excel ribbon.
- Click on “Text to Columns” in the “Data Tools” group.

Step 3: Choose the Fixed Width Option
- In the “Convert Text to Columns Wizard,” choose the “Fixed width” option.
- Click “Next” to proceed.

Step 4: Define the Breakpoint
- You will see a vertical line representing the breakpoint in the data preview.
- Click on the point where you want to split the date, which is just before the year begins.
- The breakpoint will be indicated by a dashed line.

Step 5: Complete the Text to Columns Wizard
- Click “Next” to proceed to the final step.

- Choose the destination cell where you want the modified date to appear. Also, check the Text option in “Column data format”.
- Click “Finish.”
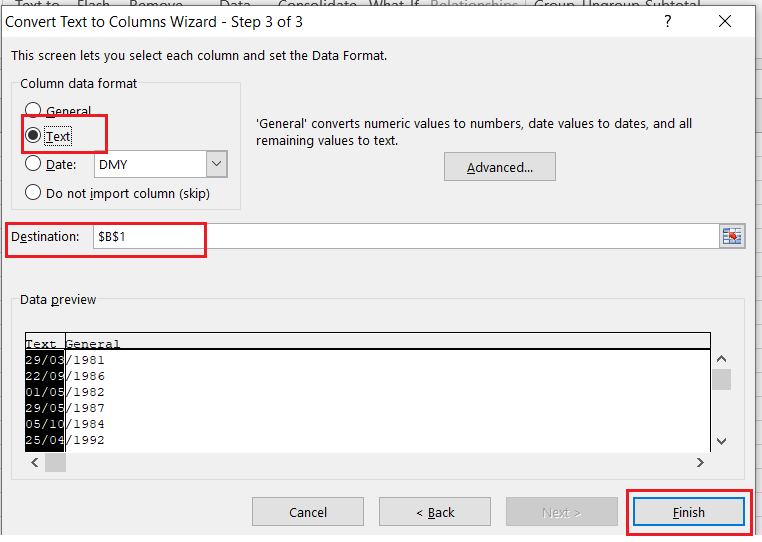
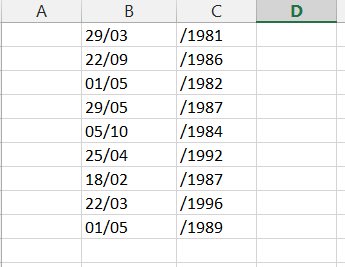
- Your results will be visible in your desired location.
Additional Information
The Text to Columns method allows you to handle various date formats within the same dataset. Excel is intelligent enough to recognize different date structures and adjust accordingly. However, keep in mind that this technique is destructive, meaning it will overwrite the original date column with the modified dates. Ensure you have a backup of your data before applying this method.
Method 2: Custom Date Formatting
Excel provides the flexibility to create custom date formats that suit your needs.
Step 1: Select the Date Column
Start by selecting the column with the dates you want to modify.
Step 2: Access the Format Cells Dialog Box
- Right-click on the selected cells and choose “Format Cells.”
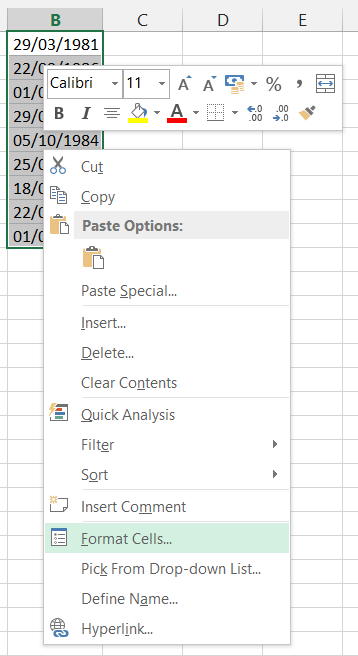
- In the “Number” tab, select “Custom.”

Step 3: Define the Custom Date Format
- In the “Type” field, enter a custom format code that displays only the month and day. For example, enter “mm-dd” to show the month and day in two-digit format.
- Click “OK” to apply the format.

- You’ll have your years removed.

Additional Information
Using custom date formatting is a non-destructive method, meaning it won’t change the actual value of the date. Instead, it alters how the date is displayed while preserving the original data. This approach is particularly useful when you want a quick and temporary visual representation of the modified date without altering the underlying data.
Conclusion
Removing the year from a date in Excel is a simple yet powerful technique that can enhance your data analysis and visualization efforts. In this article, we explored two formula-free methods: utilizing the Text to Columns feature and employing custom date formatting.
The Text to Columns method is valuable for managing different date formats within a dataset, but remember to back up your data before applying it. On the other hand, custom date formatting offers a non-destructive way to visually represent modified dates without changing the actual data.
By mastering these techniques, you’ll be better equipped to extract valuable insights from your data, whether you’re tracking sales, planning events, or analyzing trends.