In the world of data manipulation and analysis, Microsoft Excel stands as a powerful and indispensable tool. From simple calculations to complex data visualizations, Excel empowers users to harness the potential of their data efficiently and effectively. One fundamental aspect of data handling involves extracting specific components, such as month and year, from dates.
Whether you’re a seasoned Excel user or just stepping into the realm of spreadsheet wizardry, understanding how to extract the month and year from a date can significantly enhance your ability to uncover insights and make informed decisions.
In this comprehensive guide, we will delve into the technique that Excel offers to effortlessly obtain month and year-from-date values. Whether you’re looking to organize sales records, analyze project timelines, or track employee attendance, the ability to extract month and year information from dates will prove invaluable.
Method: Using Text Function for Basic Extraction
- Open Your Excel Spreadsheet: Begin by launching Excel and opening the spreadsheet that contains the date you wish to work with. Whether you’re dealing with sales records, project timelines, or personal data, this method remains universally applicable.
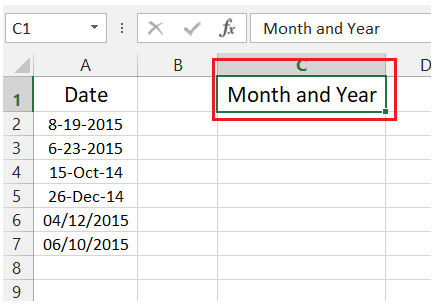
- Select an Empty Cell: Choose an empty cell where you want the extracted month and year to appear. This cell will serve as the destination for your extraction formula. You can name it “Month and Year” for better understanding
- Formulate the Function: In the selected empty cell, input the following formula:=TEXT(date, “mmmm yyyy”)
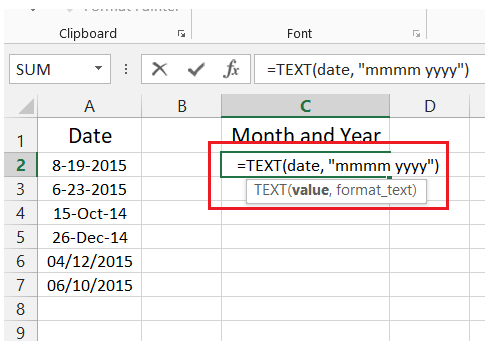
- Replace “date” with the cell reference that contains the date you intend to extract information from.

- Press Enter: Once you’ve entered the formula, press Enter to execute it. Excel will promptly process the formula and generate the desired output.
- View the Result: Behold the magic as the chosen cell now displays the extracted month and year in the format “Month Year” (e.g., “July 2023”). This clean and intuitive format enhances readability and aids in data interpretation. You can do the same steps for the rest of the cells too:

Tips and Tricks for Effective Extraction
Custom Formatting for Enhanced Precision
- Abbreviated Month: The TEXT function offers flexibility in formatting. To display the abbreviated month, employ the “mmm” format code. For instance, using “mmm yyyy” would result in “Jul 2023” for July 2023.
- Two-Digit Year: Should you desire a concise representation of the year, employ the “yy” format code. This results in the last two digits of the year being displayed (e.g., “23” for 2023).
Dynamic Cell References for Adaptability
- Cell References: Embrace the power of dynamic cell references. By utilizing cell references for the date input, your extraction formula remains adaptable to changes within your dataset. This dynamic approach minimizes manual adjustments, enhancing efficiency and accuracy.
- Drag-and-Drop Application: Once you’ve formulated the extraction formula, you can leverage Excel’s drag-and-drop functionality. Simply drag the bottom-right corner of the cell with the formula to apply it to adjacent cells. Excel will automatically adjust the cell references, providing rapid and consistent extraction.
Ensuring Proper Date Formatting
- Date Recognition: Excel relies on accurate date formatting for successful extraction. Prior to applying extraction functions, confirm that the cell containing the date is appropriately formatted as a date. Incorrect formatting may lead to errors or unexpected results.
Issues and Troubleshooting
Addressing Incorrect Output
- Number or Gibberish: If the extracted month and year appear as numbers or nonsensical characters, verify that the cell containing the date is correctly formatted as a date. Additionally, double-check the accuracy of your formula to ensure proper execution.
- Function Recognition: In certain cases, the TEXT function may not be recognized. To resolve this, ensure that you’re using a version of Excel that supports this function. Generally, the TEXT function is available in Excel 2007 and later versions.
Handling Date Locale Discrepancies
- Language Differences: Depending on your locale settings, month names might appear in a language other than English. To maintain consistency, you can incorporate a language code within the TEXT function. For example, “[$-en-US]mmmm yyyy” ensures the display of English month names regardless of locale.
Conclusion
Mastering the art of extracting the month and year from a date in Excel empowers you with a valuable skill that enhances data analysis and decision-making. The method described in this guide, combined with the tips, tricks, and troubleshooting insights, ensures a seamless and accurate extraction process.
Whether you’re a business professional conducting sales analysis, a project manager tracking milestones, or a student handling academic data, Excel’s date extraction capabilities elevate your data manipulation prowess.
As you embark on your journey of data exploration, remember that the ability to extract meaningful insights from dates is a powerful tool in your Excel toolkit.