Microsoft Excel stands as one of the most versatile and widely used tools for data management and analysis. Its capabilities extend beyond mere calculations and encompass an array of features designed to enhance data visualization. One such feature is cell highlighting, which empowers users to emphasize specific data points, track changes, or simply add a touch of vibrancy to their spreadsheets.
However, the need to modify, adjust, or completely remove these highlights often arises as data evolves or reporting requirements change. In this comprehensive guide, we will delve into the nuances of unhighlighting in Excel, offering you a step-by-step approach to effectively manage and manipulate cell highlights.
Understanding the Significance of Cell Highlighting
Before delving into the intricacies of unhighlighting, it’s essential to grasp the significance of cell highlighting within the realm of Excel. Highlighting serves as a visual aid, enabling users to quickly identify and differentiate between various data points.
By applying distinct background colors to cells, you can categorize information, draw attention to critical figures, or establish a coherent data hierarchy. Excel provides a spectrum of color options, ensuring that your highlighting efforts are both flexible and tailored to your specific needs.
The Importance of Unhighlighting
While highlighting undoubtedly enhances the readability and visual appeal of your Excel spreadsheets, unhighlighting is equally crucial. As your data evolves and reporting requirements change, the need to reevaluate and adjust your highlighting scheme arises.
Unhighlighting ensures that your spreadsheet remains accurate, uncluttered, and aligned with your current data interpretation. Whether you’re making updates, refining categories, or streamlining your data visualization, the ability to unhighlight seamlessly plays a pivotal role in maintaining data integrity.
A Step-by-Step Guide to Unhighlighting in Excel
1. Clearing Single Cell Highlights
Should you find the need to remove a highlight from an individual cell, follow these steps:
- Step 1: Select the cell containing the highlight you wish to remove.

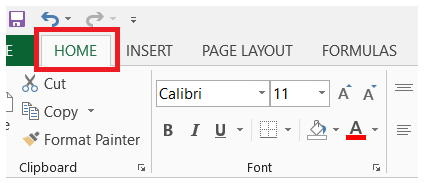
- Step 2: Navigate to the “Home” tab on the Excel ribbon.
- Step 3: Within the “Editing” group, locate and click on the “Clear” dropdown.

- Step 4: From the dropdown menu, opt for “Clear Formats.”

2. Removing Highlight from a Cell Range
When dealing with a range of cells, the unhighlighting process involves a few additional steps:
- Step 1: Highlight the range of cells that require unhighlighting.

- Step 2: Proceed to the “Home” tab.

- Step 3: Within the “Font” group, click on the “Fill Color” dropdown.

- Step 4: Choose the “No Fill” option to eliminate the highlighting.

Keyboard Shortcuts for Efficient Unhighlighting
Excel accommodates users who prefer keyboard shortcuts for swift actions:
- Clear Formats: Utilize the keyboard shortcut Ctrl + Shift + Space.
- No Fill: Employ the keyboard shortcut Alt + H, H.
Overcoming Unhighlighting Challenges
Should you encounter challenges while attempting to unhighlight cells, consider the following remedies:
- Check for Merged Cells or Conditional Formatting: Merged cells or existing conditional formatting rules may impact the unhighlighting process. Address these factors before proceeding.
- Ensure Correct Procedure: Verify that you’re following the prescribed steps for unhighlighting. Small deviations can lead to unexpected results.
- Create Backups: Prior to implementing extensive changes, create backups of your spreadsheets. This precautionary measure safeguards your data against accidental alterations.
Optimal Practices for Excel Cell Formatting
To maximize the effectiveness of cell highlighting and unhighlighting, adhere to these best practices:
- Exercise Restraint: Use highlighting judiciously to prevent overwhelming your spreadsheet with an excess of colors.
- Choose Distinctive Colors: Opt for colors that are visually distinct and facilitate easy differentiation.
- Document Formatting Conventions: Maintain documentation outlining your chosen highlighting conventions for future reference and consistency.
Conclusion
In this comprehensive guide, we’ve traversed the realm of unhighlighting in Excel. Beyond the realms of data entry and calculations, Excel’s cell highlighting and unhighlighting capabilities empower users to communicate and interpret data dynamically. By mastering the art of unhighlighting, you can ensure that your data remains accurate, comprehensible, and well-organized, reflecting your evolving insights and analytical needs.
Enhance your Excel prowess by seamlessly transitioning from cell highlighting to unhighlighting. Whether you’re a seasoned Excel aficionado or a novice seeking to harness the power of data visualization, mastering this skill contributes to more efficient and effective spreadsheet management.