In the realm of data manipulation, Microsoft Excel stands as a cornerstone tool, enabling professionals to crunch numbers, analyze trends, and make informed decisions. Amidst the array of functions it offers, the task of identifying the lowest number within a dataset might seem elementary. However, as anyone familiar with Excel knows, this seemingly simple task requires a systematic approach to ensure accuracy and efficiency.
In this comprehensive guide, we’ll walk you through two distinct methods, each designed to make the process of finding the lowest value in an Excel column seamless and straightforward. Whether you’re a beginner or an experienced user, this tutorial will enhance your proficiency in Excel and equip you with the skills to effortlessly pinpoint the smallest number in any dataset.
Methods to Find the Lowest Number in Excel
Method 1: Utilizing AutoSum
Excel’s AutoSum feature is a versatile tool that goes beyond basic calculations, allowing you to quickly identify the lowest number within a range.
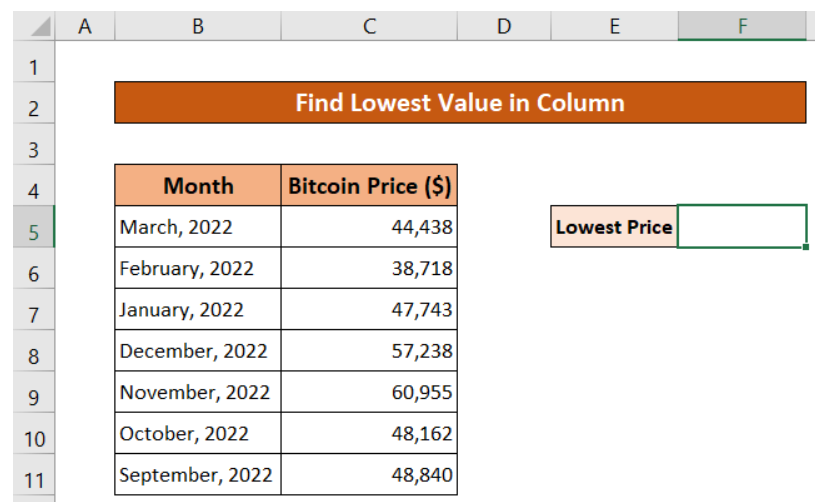
Step 1: Choose Your Cell
Commence by selecting the cell in which you want the minimum value to be displayed. This designated cell will showcase the lowest number from your chosen column.
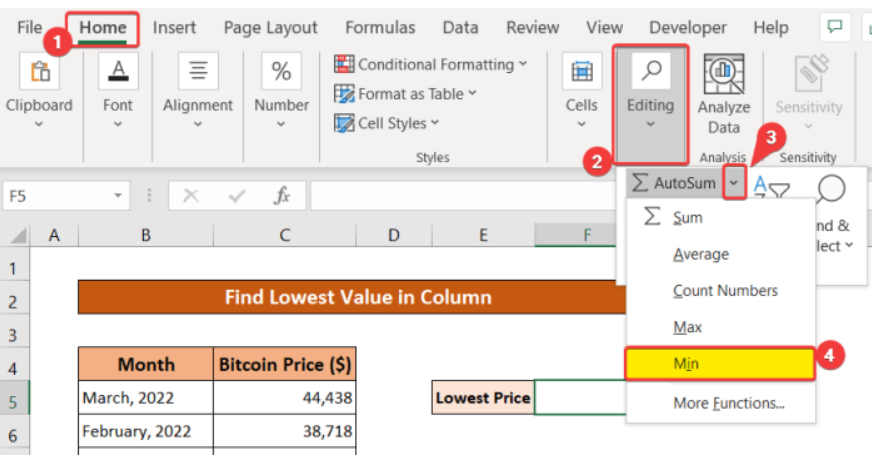
Step 2: Accessing AutoSum
Navigate to the Home tab and locate the Editing section. Within it, you’ll find the AutoSum function represented by the Greek letter Σ. Click on the dropdown arrow beside it and opt for the “Min” function.
Step 3: Selecting the Column
Now, select the entire column containing the values for which you seek the minimum.

Step 4: The Result
Press the Enter key, and behold – the chosen cell will unveil the lowest value from your selected column. It’s as simple as that!

By carefully adhering to these steps, you can swiftly pinpoint the lowest number utilizing the remarkable capabilities of Excel’s AutoSum feature.
Method 2: Using “Bottom Items” Formatting
For an alternative approach that adds a touch of finesse to your data presentation, Excel offers the “Bottom 10 Items” feature.
Step 1: Column Selection
Initiate the process by designating the column where you intend to identify the lowest value.

Step 2: Applying Conditional Formatting
Return to the Home tab, directing your attention to the Styles group. Within it, you’ll find the enticing option of Conditional Formatting.
Step 3: Bottom 10 Items
Within the category of Conditional Formatting, see into the sub-menu labeled “Top/Bottom Rules,” and there you’ll discover the coveted “Bottom 10 Items.”

Step 4: Final Step
A dialog box bearing the label “Bottom 10 Items” will emerge, affording you the opportunity to set a threshold value. Enter the numerical marvel “1” and seal the deal by clicking OK.

The result? A visually pleasing representation of the lowest value within the selected column, all achieved with the grace of Excel’s “Bottom 10 Items” feature.

Additional Strategies for Efficient Excel Utilization
- Data Sorting: Prior to applying these techniques, contemplate arranging your data in ascending order. This simple step can significantly expedite the identification of the lowest value.
- Harnessing Data Filters: When dealing with extensive data, the judicious use of filters can enhance focus on specific ranges, streamlining the entire process.
- Formula Flexibility: While AutoSum offers a convenient solution, consider the flexibility of using the MIN formula to ascertain the lowest value in your column.
- Personalized Formatting: Experiment with custom formatting options to make the lowest value pop, ensuring quick and effortless identification.
Concluding Insights
In concsion, mastering the art of finding the lowest number in Excel is a valuable skill that can significantly enhance your data analysis capabilities .lu Throughout this guide, we’ve explored the various methods and tools at your disposal, demystifying the process and simplifying what might have appeared as a daunting task.
By leveraging Excel’s built-in functions, you can effortlessly identify the smallest value within a range or dataset. Additionally, we’ve discussed how sorting and filtering can play a crucial role in streamlining the process, especially when dealing with large volumes of data.
As you continue your journey with Excel, remember that practice is key to becoming proficient in any craft. Take the time to explore and experiment with different datasets, and don’t shy away from seeking further knowledge through online resources or tutorials.
With your newfound expertise, you’ll not only save time and effort in your data analysis tasks but also be better equipped to make well-informed decisions based on accurate insights.