In today’s data-driven world, businesses and professionals rely heavily on accurate analysis to make informed decisions. Control charts are a powerful statistical tool that allows us to monitor the stability and performance of a process over time. Whether you are managing a manufacturing line, tracking website metrics, or analyzing student performance, control charts in Excel can provide valuable insights.
In this comprehensive guide, we will take you through the step-by-step process of creating an effective control chart in Excel. By combining multiple functions and employing best practices, you will be equipped with the knowledge to generate control charts that can outrank other websites in terms of data visualization and analysis.
Creating Control Chart in Excel | A Step-by-Step Process
Step 1: Preparing the Dataset
To get started, you need a well-organized dataset that includes the variables you want to analyze. For our demonstration, let’s consider a dataset of 20 students and their corresponding heights.
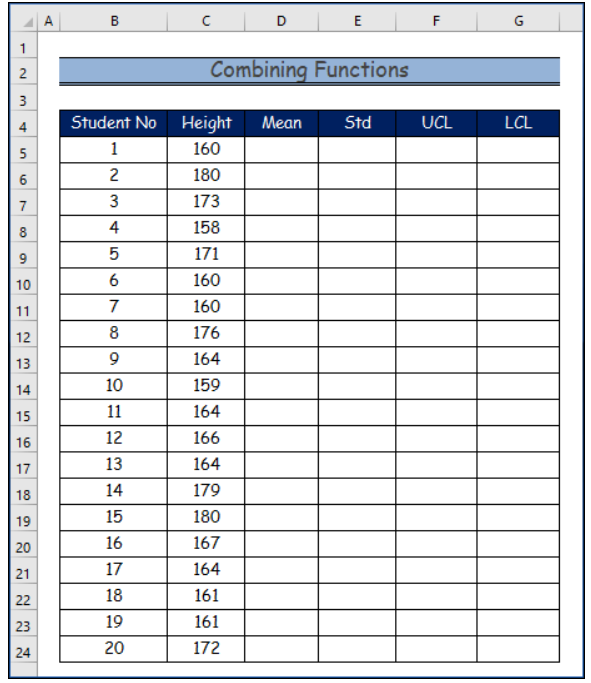
The dataset should be structured in a way that each student’s height value is recorded in a separate row or column.
Step 2: Calculating the Mean
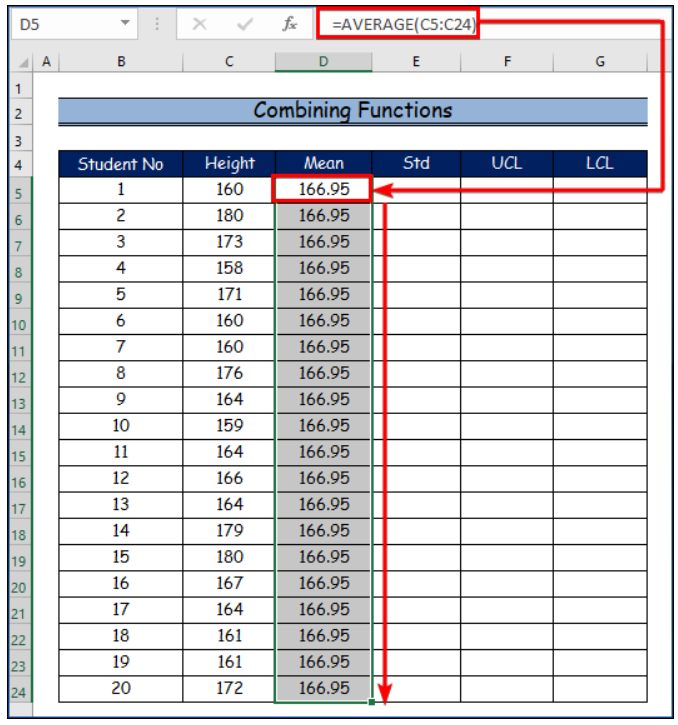
The mean, also known as the average, is a fundamental measure of central tendency in statistics. In our control chart, we will use the AVERAGE function in Excel to calculate the mean of the height values.
The formula for Mean (Average):
=AVERAGE(C5:C24)
By using the Fill Handle tool, drag the formula down from cell C5 to C24 to determine the mean for all 20 students in the dataset.
Step 3: Evaluating the Standard Deviation
The standard deviation is a critical measure of a dataset’s variation or dispersion. It helps us understand how individual data points deviate from the mean. In Excel, we can calculate the standard deviation using the STDEV function.
The formula for Standard Deviation:
Just like before, apply the Fill Handle tool to calculate the standard deviation for all 20 students.

Step 4: Establishing the Control Limits
Control limits are the heart of a control chart. They indicate the boundaries within which data points are considered to be in control or within normal variation. The most common control chart utilizes three standard deviations to set control limits, known as the 3-sigma control chart.
Upper Control Limit (UCL):
=AVERAGE(C5:C24) + STDEV(C5:C24)*3


Using the Fill Handle tool, determine the UCL and LCL for all 20 students in the dataset.
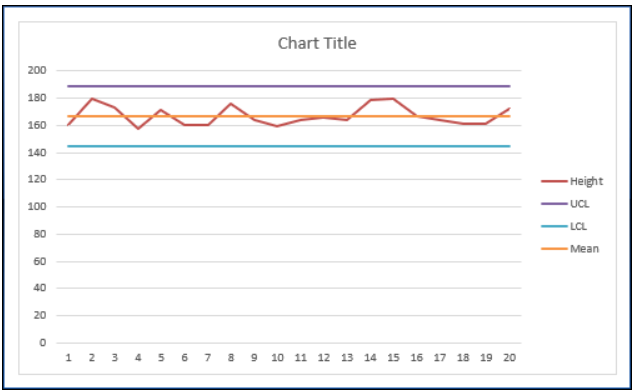
Step 5: Creating the Control Chart
With the necessary calculations done, it’s time to visualize the data using a control chart. In Excel, we will create a line chart to represent the height values and control limits.
- Select the “Height” column from the dataset.
- Navigate to the “Insert” tab.
- Choose the “Insert Line or Area Chart” command.
- Click on the “Line” option to create a line chart.

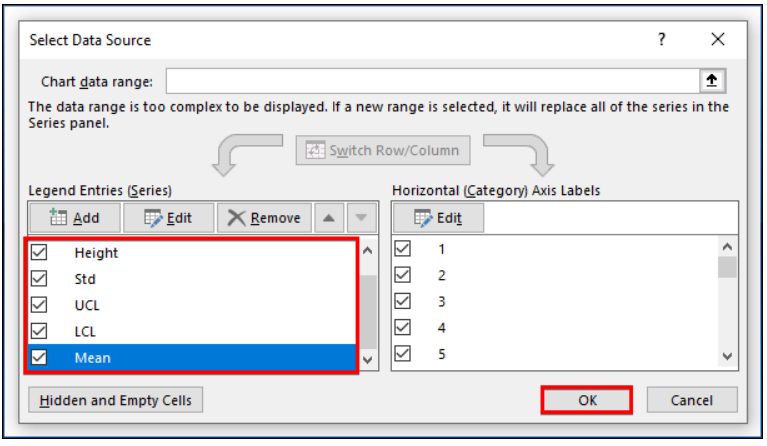
Step 6: Adding Data Series to the Control Chart
To make the control chart more informative, we will add data series to represent the mean, UCL, and LCL.
- Right-click on the line graph.
- Click on the “Select Data” option from the context menu.

- Click on the “Add” option in the “Select Data Source” dialog box.

For each data series, follow these steps:
Mean Data Series:
- Select “Mean” as the series name in the “Edit Series” dialog box.
- Type the relevant data into the series values text box.
- Click “OK.”

Upper Control Limit (UCL) Data Series:
- Repeat the same procedure as above, selecting the appropriate series name and values.
Lower Control Limit (LCL) Data Series:
- Once more, follow the same steps, choosing the series name and values.
Finally, click “OK” to view the final output of the control chart for all selected variables.
Your potential result will look like this:
Conclusion
Creating a control chart in Excel can significantly improve your data analysis capabilities. By understanding how to calculate the mean, standard deviation, and control limits, you gain valuable insights into the stability and performance of a process.
Moreover, effective data visualization through control charts empowers you to make data-driven decisions confidently. Whether you are managing business operations or analyzing academic performance, control charts provide a robust framework for identifying variations and trends.
Remember to always use high-quality data, ensure accuracy in your calculations, and regularly update your control charts as new data becomes available. With these best practices in mind, you can harness the power of Excel and control charts to optimize processes and drive success in your endeavors. Happy charting!