Data validation is a valuable feature in Excel that allows you to set specific rules and restrictions on what data can be entered into a cell. It ensures the accuracy and consistency of your data, making it an essential tool for anyone working with spreadsheets. If you want to apply the same data validation settings to a new range of cells, the process is simple and can save you valuable time. Let’s explore how to copy data validation in Excel step by step.
Step 1: Highlight the Cell with Existing Data Validation
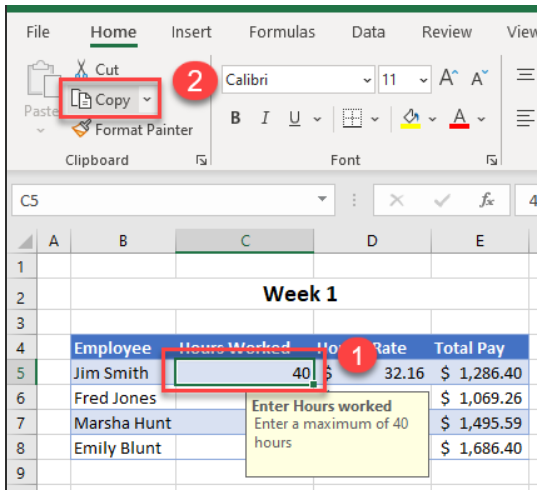
Before you can copy data validation to a new range of cells, you need to identify the cell that already contains the desired data validation rule. This could be a cell with a dropdown list of options, a date restriction, or any other form of data validation you have previously set up.
Step 2: Select the Target Range
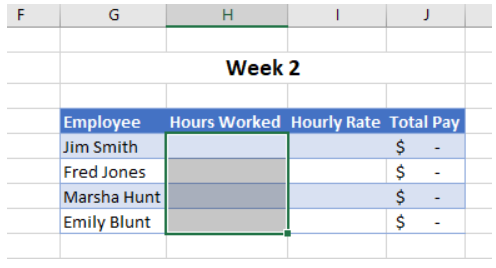
Once you’ve identified the cell with the existing data validation, the next step is to choose the target range where you want to apply the same data validation rule. It’s essential to ensure that the cells in the target range are ready to receive the validation.
Step 3: Access the “Paste Special” Option
With both the source cell and target range selected, it’s time to access the “Paste Special” option, which will allow you to copy the data validation efficiently. To do this, navigate to the “Home” tab on the Ribbon, then click on “Clipboard” and choose “Paste” from the dropdown menu.

Step 4: Choose the Validation Option
After clicking on “Paste Special,” a dialog box will appear. From this dialog box, select the “Validation” option. This will instruct Excel to paste only the data validation rule without affecting any other data or formatting in the target cells.

Step 5: Confirm and Apply
Once you’ve chosen the “Validation” option in the “Paste Special” dialog box, click on the “OK” button to apply the data validation rule to the target range. Excel will now copy the existing data validation rule to all the highlighted cells within the specified range.

Step 6: Fine-Tune the Copied Data Validation (Optional)
After pasting the data validation to the new range of cells, you may need to make some adjustments based on the specific requirements of the target cells. For example, if the original data validation referred to a list of items in the source cell, you might want to update this list to reflect the appropriate options for the target cells.
Step 7: Test the Data Validation
Before considering the task complete, it’s crucial to test the data validation in the target range. Enter various types of data to verify that the rules are working as expected. This step ensures that users will be limited to inputting the appropriate data, reducing the likelihood of errors and enhancing data accuracy.
Step 8: Benefit from Consistent Data Validation
Congratulations! You have now successfully copied data validation settings to a new range of cells in Excel. By applying the same data validation rules to multiple cells, you can ensure consistency throughout your spreadsheets, making data entry more efficient and reliable.
Why Use Data Validation in Excel?
Data validation is a powerful tool that can significantly improve the quality and reliability of your spreadsheets. Here are some key reasons why you should take advantage of this feature:
- Error Reduction: By restricting the type of data that can be entered into specific cells, you can prevent users from inputting incorrect or irrelevant information.
- Consistency: Data validation ensures that the same set of rules is applied consistently across multiple cells, guaranteeing uniformity in your data.
- Efficiency: With data validation, you can create drop-down lists or predefined options, saving users time and effort in entering data.
- Data Integrity: By enforcing data validation rules, you enhance the overall integrity of your data, making it more reliable for analysis and decision-making.
- Customization: Excel’s data validation allows you to customize the rules according to the specific needs of your spreadsheet, giving you greater control over data entry.
Conclusion
Data validation is a fundamental feature in Excel that empowers you to control and maintain the accuracy of your data. By learning how to copy data validation settings to new cells, you can efficiently apply the same rules throughout your spreadsheets, ensuring consistency and reliability in your data entry.
Embrace the power of data validation in Excel, and you’ll find yourself working with more dependable and accurate data, ultimately making better-informed decisions in your professional endeavors.