If you’ve ever found yourself in a situation where you needed to trim off that pesky last character from a cell or a range of cells in your Excel spreadsheet, you’re not alone. This seemingly straightforward task can cause frustration for even the most seasoned Excel users.
However, fear not! In this comprehensive guide, we will walk you through several efficient methods to handle this issue like a pro, saving you precious time and effort.
Whether you’re a beginner seeking Excel enlightenment or a seasoned professional looking to streamline your data manipulation techniques, our step-by-step instructions and helpful tips will equip you with the knowledge to confidently trim away those trailing characters and optimize your spreadsheet workflow. So, let’s dive in and discover the various ways to bid farewell to that last character in Excel!
Steps to Remove the Last Character in Excel
In the process below, we will be using a dataset comprising four essential columns: Student Id, Name, Course No, and Email Id.
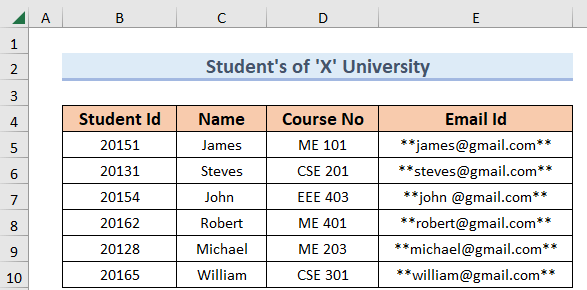
Our goal is to demonstrate how to remove the last character from the student ID row and extract the necessary data from this dataset. Let’s embark on this data journey together!
To begin the process, follow these steps:
- Select the Output Cell (E5): Identify the cell where you want the extracted year value to appear.
- Enter the Formula: Type in the following function:
=VALUE(REPLACE(B5, LEN(B5), 1, “”))

In this formula, B5 represents the Student ID cell. The LEN(B5) calculates the total number of characters in cell B5 (which is 5 in this case), and then it uses this value as the start_num.
Since we want to remove the last character, we set num_chars to 1. The last character gets removed by providing an empty string (“”) as the new text. Finally, the VALUE function converts the result into a number.
- Press ENTER: Execute the formula to get the desired output.

- Fill Down the Formula: Drag down the Fill Handle icon to copy the formula to other cells in the Year Column.

By following these steps, you will achieve the desired result:

Alternative Excel Functions for Removing the Last Character
Apart from using the REPLACE function, Excel offers other functions that can achieve the same result. Two such functions are:
1. RIGHT Function
The RIGHT function allows you to extract a specific number of characters from the right side of a text string. In this case, you can use it to remove the last character from the Student ID.
The formula would be:
=VALUE(RIGHT(B5, LEN(B5) – 1))
Here, the RIGHT function takes the Student ID (cell B5) as input and extracts all characters except the last one, using the LEN(B5) – 1 as the number of characters to extract.
2. LEFT Function
The LEFT function extracts a specified number of characters from the beginning (left side) of a text string. Although it may seem counterintuitive, you can use it creatively to remove the last character.
The formula would be:
=VALUE(LEFT(B5, LEN(B5) – 1))
The LEFT function considers all characters in the Student ID (cell B5) except the last one, using the LEN(B5) – 1 as the number of characters to extract.
Both the RIGHT and LEFT functions, when combined with the VALUE function, result in extracting the year from the Student ID.
Conclusion
In conclusion, mastering the art of efficiently manipulating data in Excel is essential for professionals and enthusiasts alike. Removing the last character from cells might seem like a simple task, but it opens the door to a multitude of possibilities for data cleansing, formatting, and analysis.
Through the techniques explored in this blog post, including using formulas, functions, and other Excel features, users can streamline their workflows, improve data accuracy, and save valuable time. Whether you’re dealing with large datasets or handling day-to-day tasks, these methods offer versatile solutions that empower users to confidently work with Excel and optimize their data processing endeavors.
As you continue to explore and experiment with Excel’s vast capabilities, you’ll discover even more creative ways to manipulate data, paving the way for enhanced productivity and insightful decision-making. So, embrace the knowledge gained here and venture forth with newfound Excel expertise, ready to tackle any data challenge that comes your way.