As a powerful function, XLOOKUP empowers users to enhance their data analysis and search capabilities, making it an invaluable tool for professionals and enthusiasts alike.
Whether you’re a beginner looking to learn the basics or an experienced user seeking to unlock the full potential of XLOOKUP, this tutorial will guide you through each stage with clarity and precision. By following our instructions, you’ll gain a deep understanding of how to leverage this function to efficiently search and retrieve data within your Excel spreadsheets.
Throughout this tutorial, we’ll provide clear explanations, practical examples, and expert tips to ensure that you grasp the concepts and techniques required to master XLOOKUP. Get ready to elevate your Excel skills and streamline your data analysis workflow as we embark on this insightful journey together. Let’s dive in and unlock the vast potential of XLOOKUP!
Step 1: Choose an Empty Cell
The first step towards harnessing the full potential of the XLOOKUP function is to select an empty cell within your Excel spreadsheet. Whether you opt to work with an existing spreadsheet or create a new one, ensure that you have a designated cell where the desired results will be displayed.
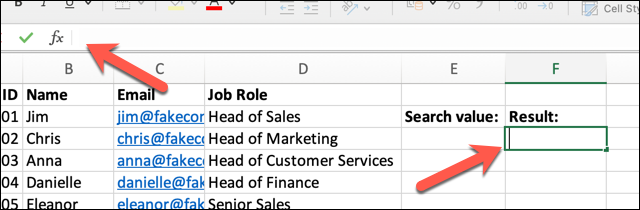
Once the cell is chosen, proceed to the next step.
Step 2: Define Your Search Criteria
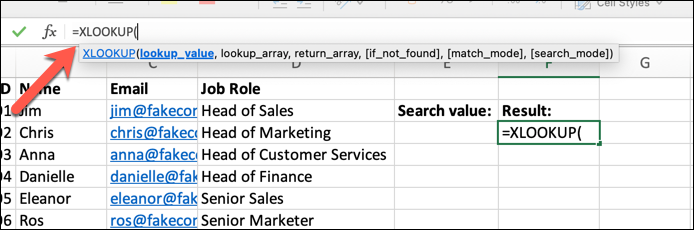
To utilize the XLOOKUP function seamlessly, it is crucial to adhere to its specific syntax and structure. Begin by entering the formula “=XLOOKUP(” into the formula bar. Next, specify your search criteria.
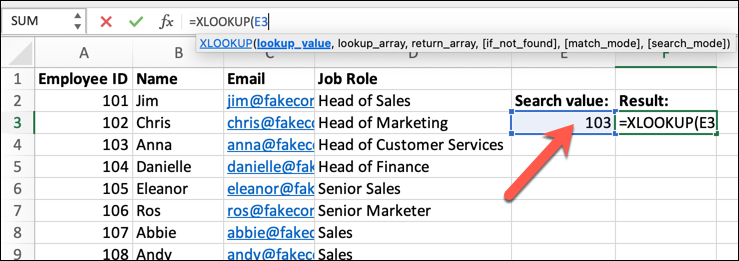
While the XLOOKUP function supports both numbers and text strings, it is recommended to utilize cell references for added flexibility. For instance, if you are working with an employee list and intend to find the job role based on an ID number, the formula “=XLOOKUP(E3,” should be followed by the appropriate lookup and return ranges.
Step 3: Identify the Data Set
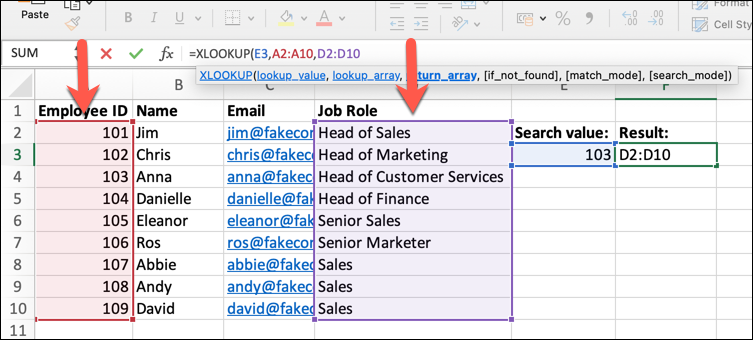
Once you have defined your search criteria, the next step is to identify the lookup_array and return_array ranges. The lookup_array refers to the column or row where you anticipate finding the search query, while the return_array represents the column or row that contains the desired data to retrieve.
For instance, in an employee data set with columns such as Name, ID, Email Address, and Job Role, the lookup_array would typically be the ID column, while the return_array would correspond to the Job Role column.
Step 4 (Optional): Handling Not Found Values
In situations where the XLOOKUP function fails to find an exact match for the lookup value within the specified lookup_array range, Excel returns an #N/A error response. To overcome this, you can include an optional not_found argument within your XLOOKUP formula.
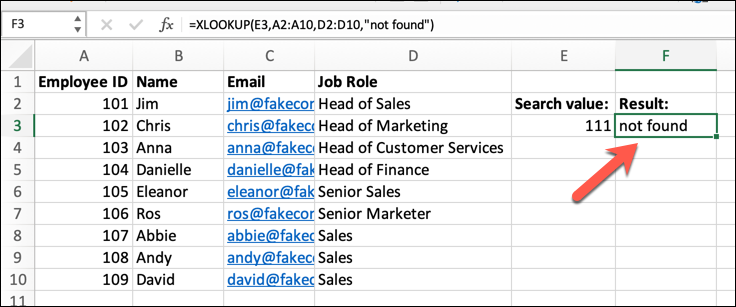
The not_found argument can take various forms, such as a numerical value, a text string enclosed in quotation marks, a boolean value, or even a cell reference. By incorporating a not_found argument, you can customize the response when an exact match is not found.
Step 5 (Optional): Fine-Tuning the Search with Match Modes
While the XLOOKUP function is primarily designed to search for exact matches, you can modify its behavior by utilizing the optional match_mode argument. The match_mode argument allows you to specify different search modes, such as exact matches, approximate matches, or wildcard matches.
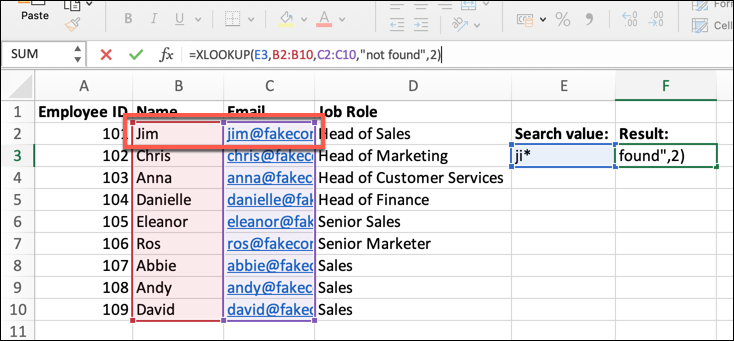
Depending on your requirements, you can choose the appropriate match_mode value to refine the search results accordingly.
Step 6 (Optional): Customizing the Value Return Order
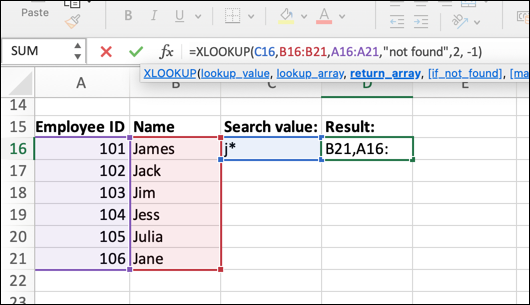
By default, Excel attempts to match the first possible value in a search query. However, you can customize the value return order by employing the optional search_mode argument.
This argument allows you to change the order in which the XLOOKUP function retrieves matching results. Whether you prefer to retrieve the first or last possible value or conduct a binary search in ascending or descending order, the search_mode argument enables you to tailor the function to your specific needs.
Conclusion
By following the instructions and examples provided, you can confidently apply the XLOOKUP function to search for specific data and retrieve corresponding values with precision and efficiency. Whether you’re working with large datasets, conducting complex searches, or need to quickly find and analyze information, XLOOKUP will prove to be an invaluable tool in your Excel arsenal.
Remember to experiment and explore different variations of XLOOKUP to further expand your understanding and optimize your data analysis processes. With practice, you will become proficient in leveraging XLOOKUP to uncover insights, make informed decisions, and save valuable time on your Excel tasks.
We hope this tutorial has equipped you with the knowledge and skills necessary to utilize XLOOKUP effectively. Keep exploring and honing your Excel skills, as there are always new features and functions to discover. With perseverance and a solid understanding of Excel’s capabilities, you can become a proficient data analyst and excel in your professional endeavors.